How to enroll an existing student into a batch
Easily assign students to batches and start their sessions.
Written by Swathi N
Lynk Tower allows you to quickly enroll existing students into batches without needing to re-enter their details. This helps you manage class assignments and get students started with their sessions seamlessly.
Why Enroll Students into a Batch?
Enrolling a student connects them to:
A specific batch or class
A schedule of sessions
A pricing plan for payments
Steps to Enroll a Student
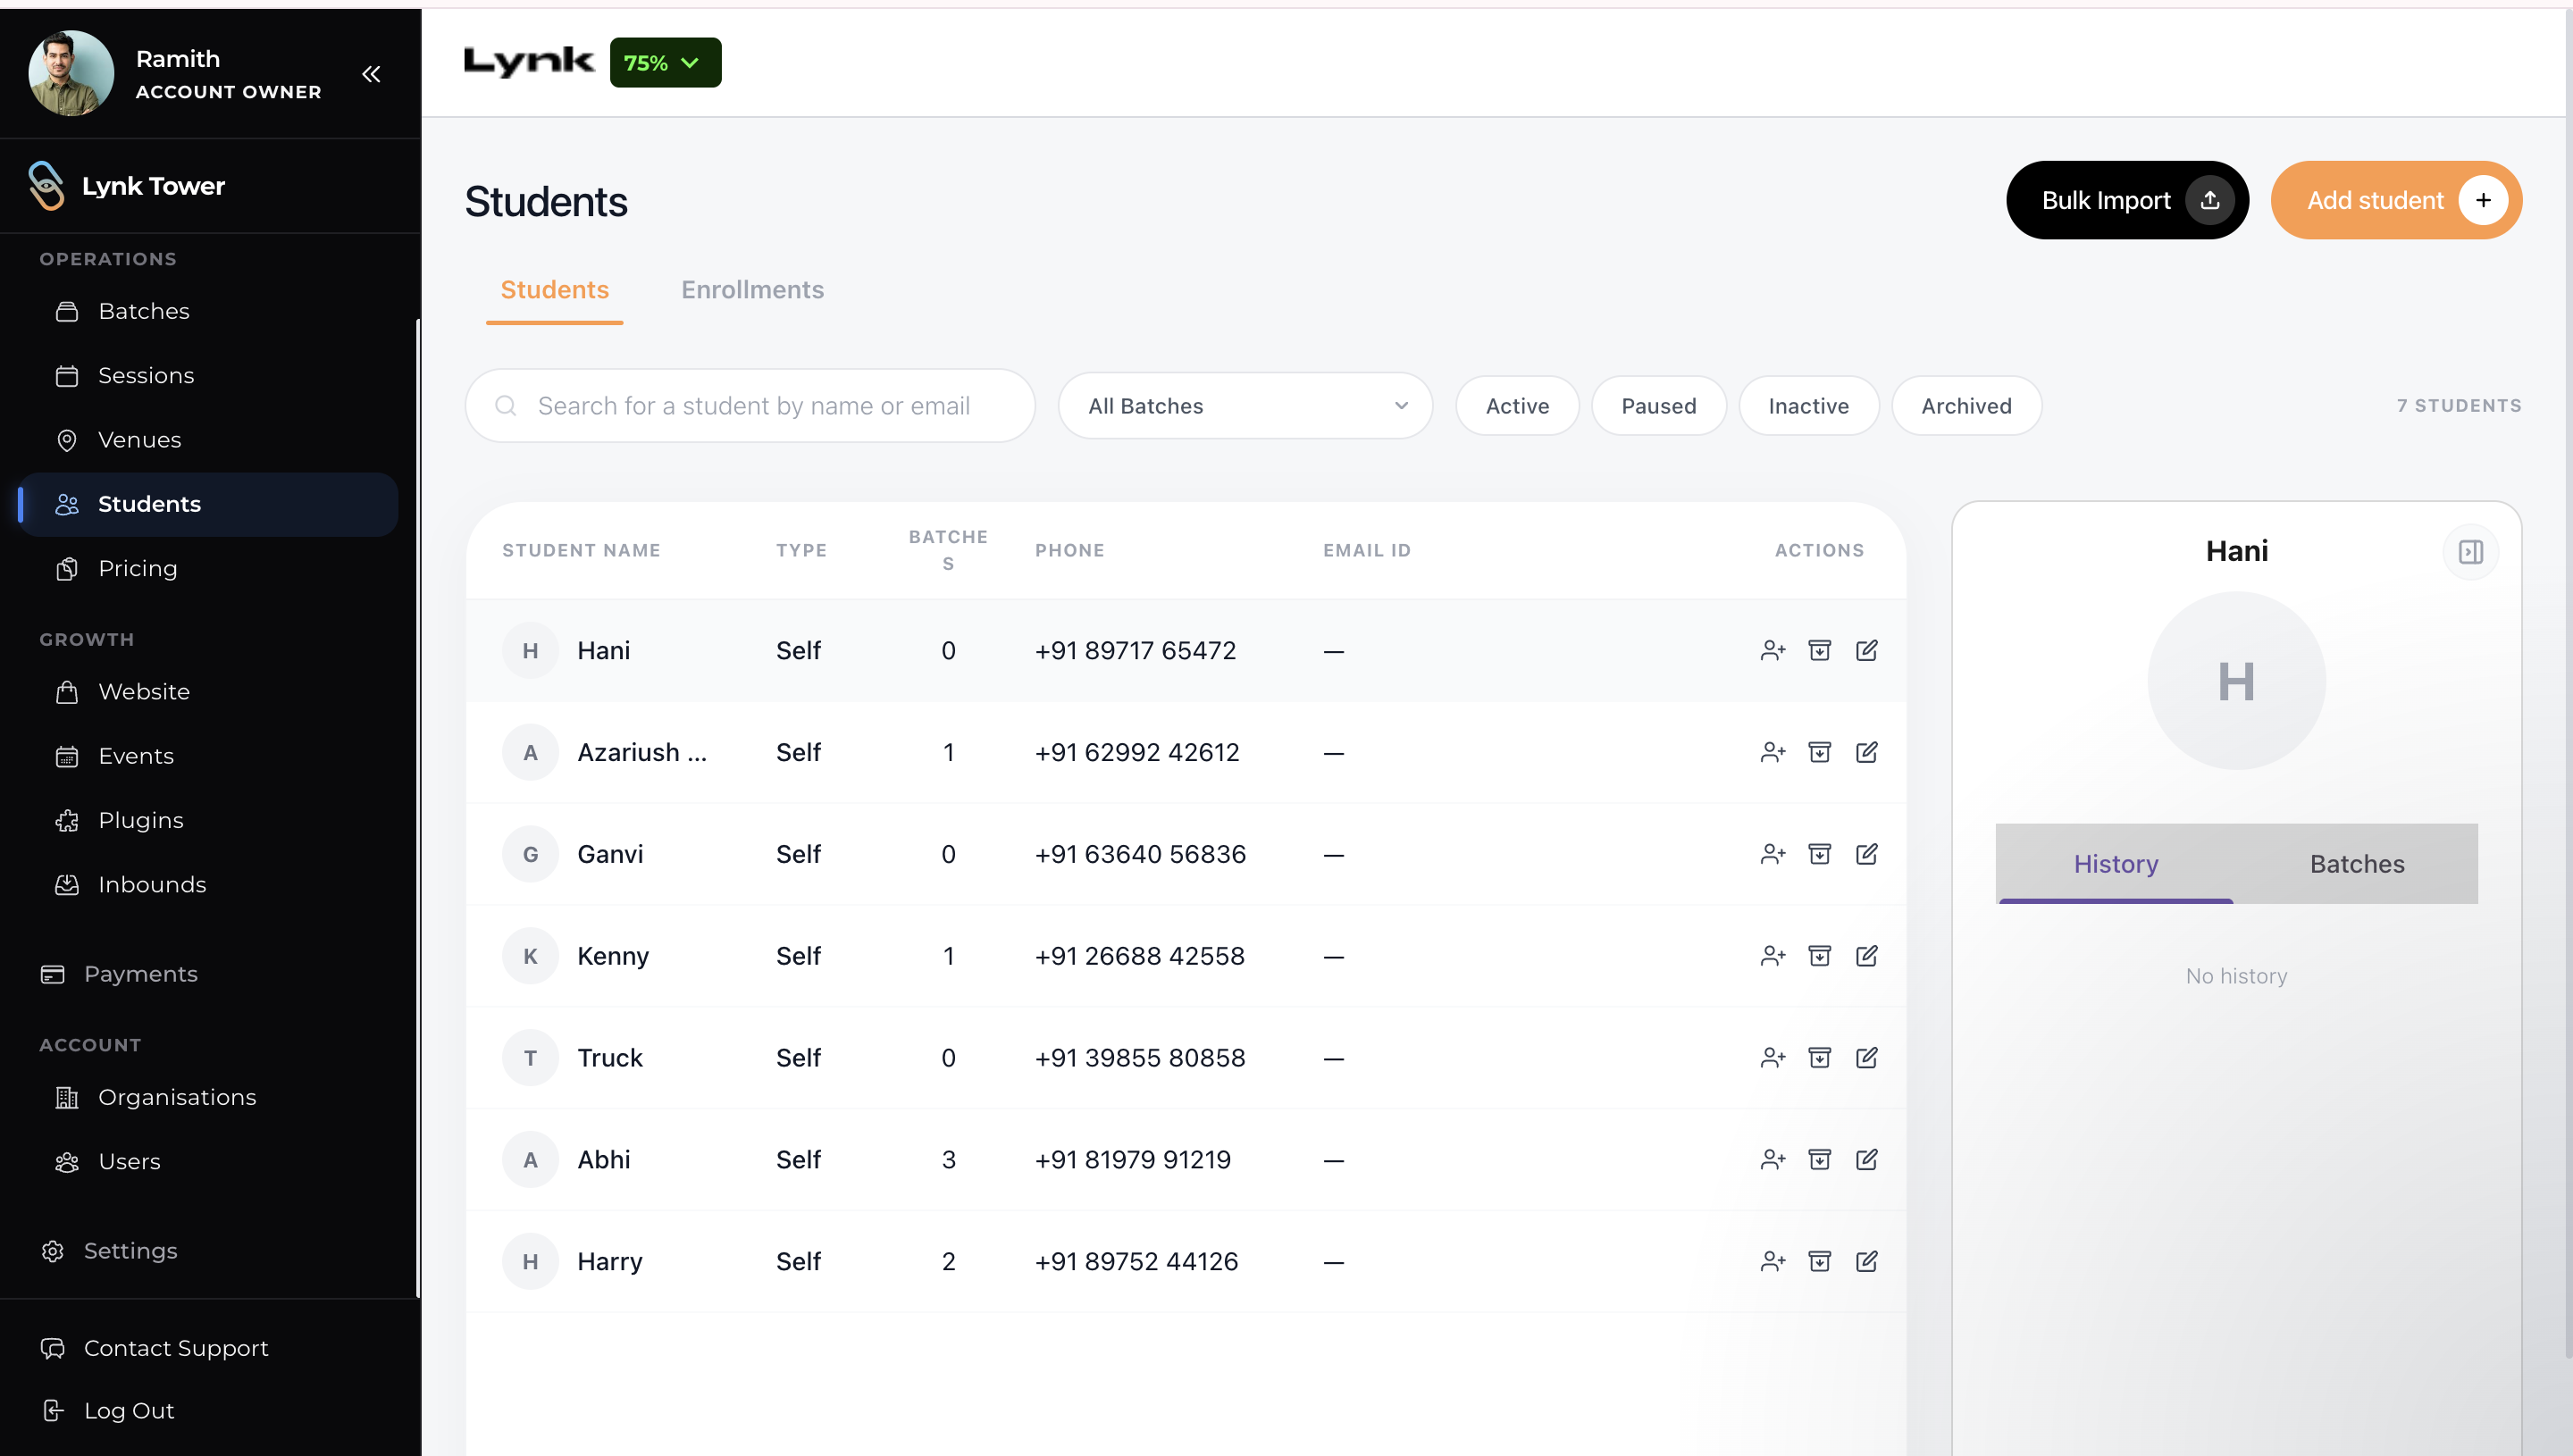
Go to the Students tab in Lynk Tower
Locate the student you want to enroll
Click on the Enroll in Batch button in the action column
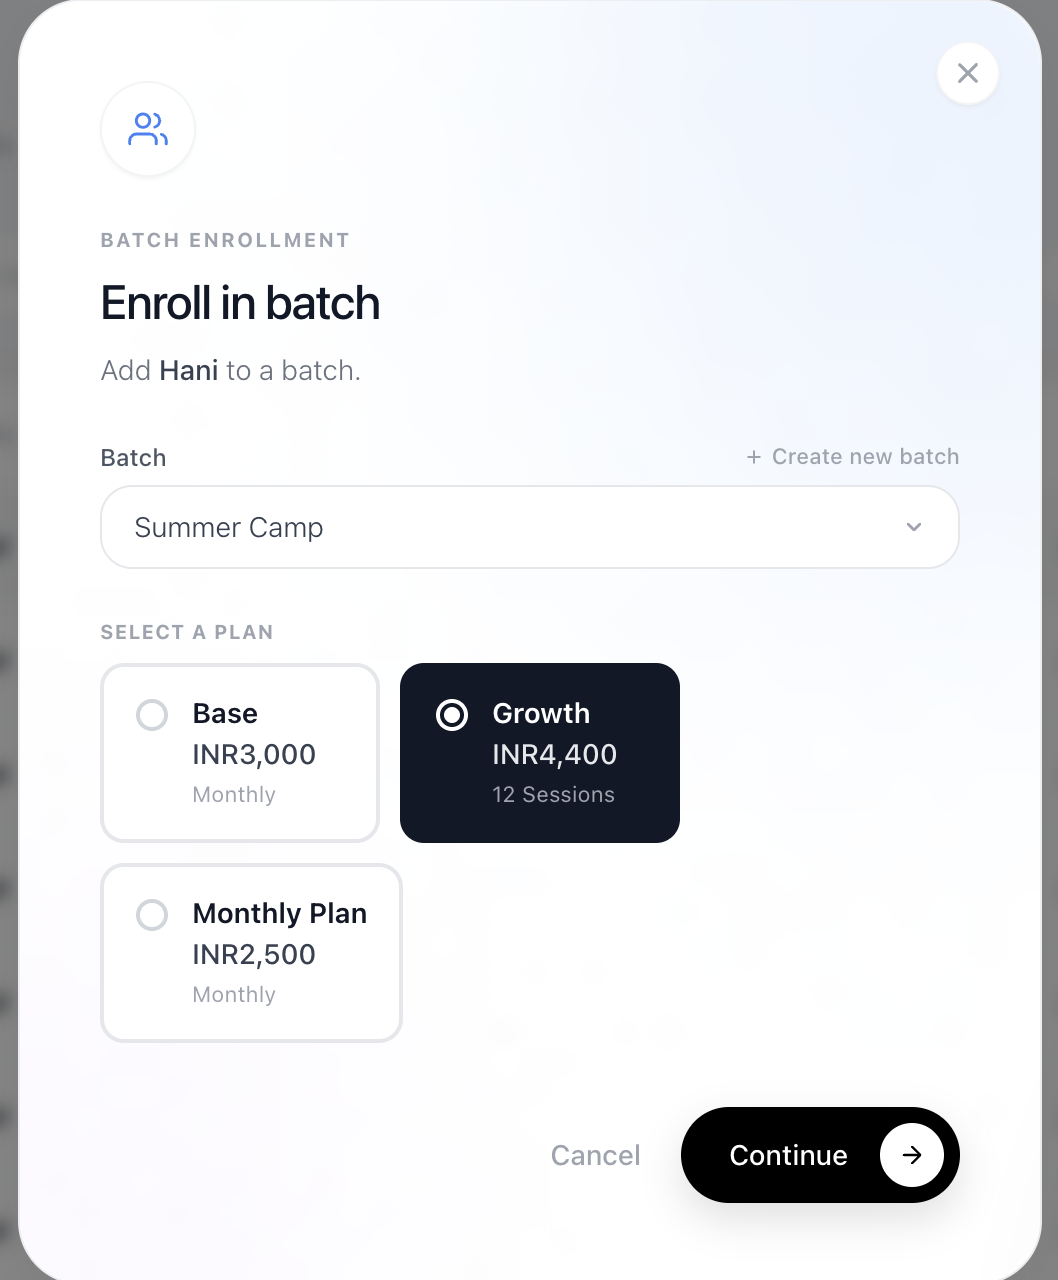
In the popup, select:
Batch
Pricing Plan
Click Continue
Configure Enrollment Details
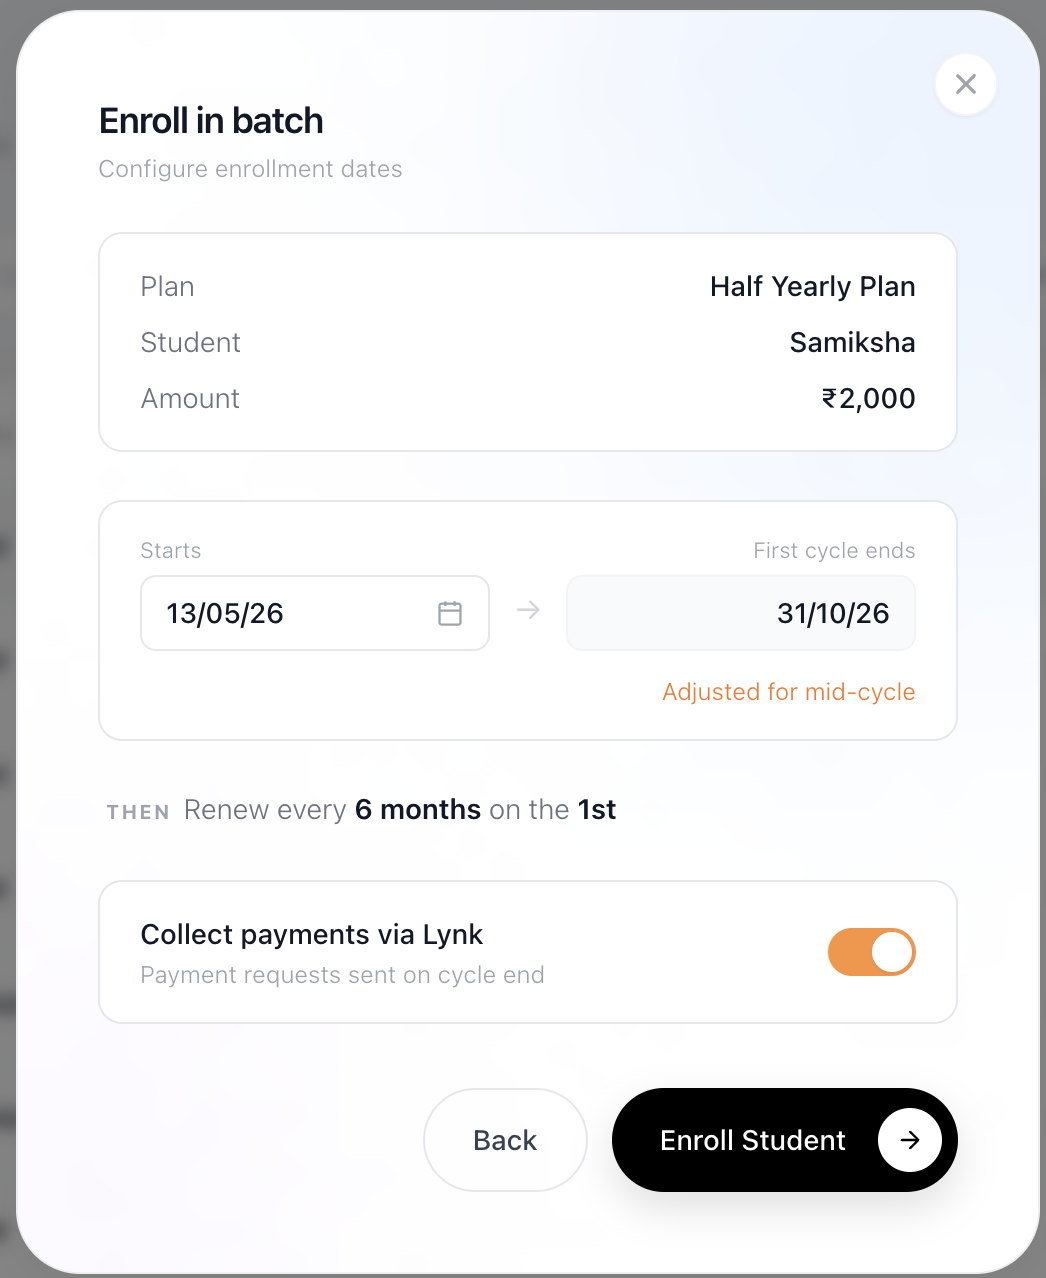
After clicking Continue, you will be taken to the Enrollment Details screen where you can review and configure:
Student name
Pricing plan
Amount
Set Plan Details
Depending on the plan type:
For Duration-Based Plans
Select the Start Date
The Cycle End Date is auto-calculated based on the plan
You can edit dates in case of mid-cycle enrollments
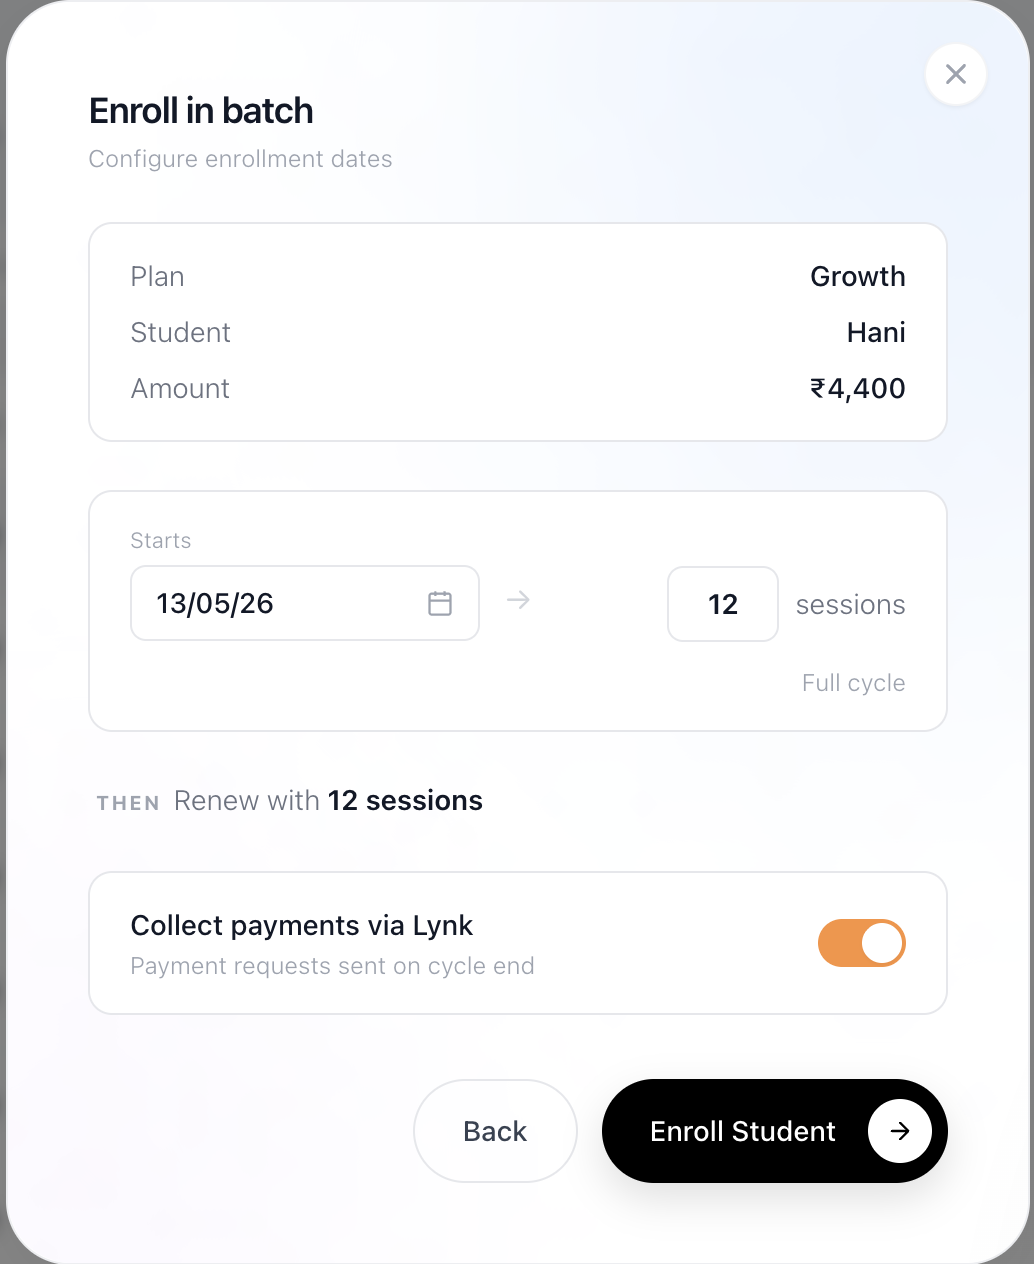
For Session-Based Plans
Select the Start Date
Define or edit the number of sessions included in the plan
Payment Option
Choose whether to collect payment via Lynk using the toggle
Click Enroll Student
What Happens After Enrollment
The student is added to the selected batch
They become Active
Their sessions and schedule are assigned
Payments can be tracked based on the selected plan
Best Practices
Ensure you select the correct batch
Choose the appropriate pricing plan
Confirm details before enrolling
Conclusion
Enrolling an existing student into a batch in Lynk Tower is quick and efficient. It helps you assign students to the right classes and ensures they are ready to begin their sessions without any delays.