How students are added to a batch
Adding students to a batch ensures they automatically appear in sessions for attendance, progress tracking, and reports. Lynk offers flexible ways to add students, whether you’re setting up a new batch or expanding an existing one.
Written by Sumit Kapoor
Add students to a batch so they’re enrolled correctly with sessions, attendance, and pricing plans.
Adding students to a batch in Lynk ensures they are automatically connected to:
Scheduled sessions
Attendance tracking
Pricing plans
Payment cycles
Progress and participation records
Lynk offers multiple ways to add students depending on whether you’re creating new students, enrolling existing ones, or managing students directly from a batch.
Why Adding Students to a Batch Matters
When a student is enrolled in a batch:
They appear automatically in upcoming sessions
Attendance is tracked instantly
Their pricing plan and billing cycle are linked
Session usage is monitored
Batch-specific reports stay accurate
Without enrollment, a student won’t be connected to that batch’s schedule or payment structure.
Ways to Add Students to a Batch
Lynk supports three primary enrollment flows:
Standard Flow (General student creation)
Adding students to an existing batch
Adding students to a new or empty batch
1. Standard Flow: Add Student First, Assign Batch During Creation
This method is useful when onboarding new students into your system.
How It Works
Go to Manage tab
Click on Add Students
Choose:
Add manually
Bulk import
Import from contacts
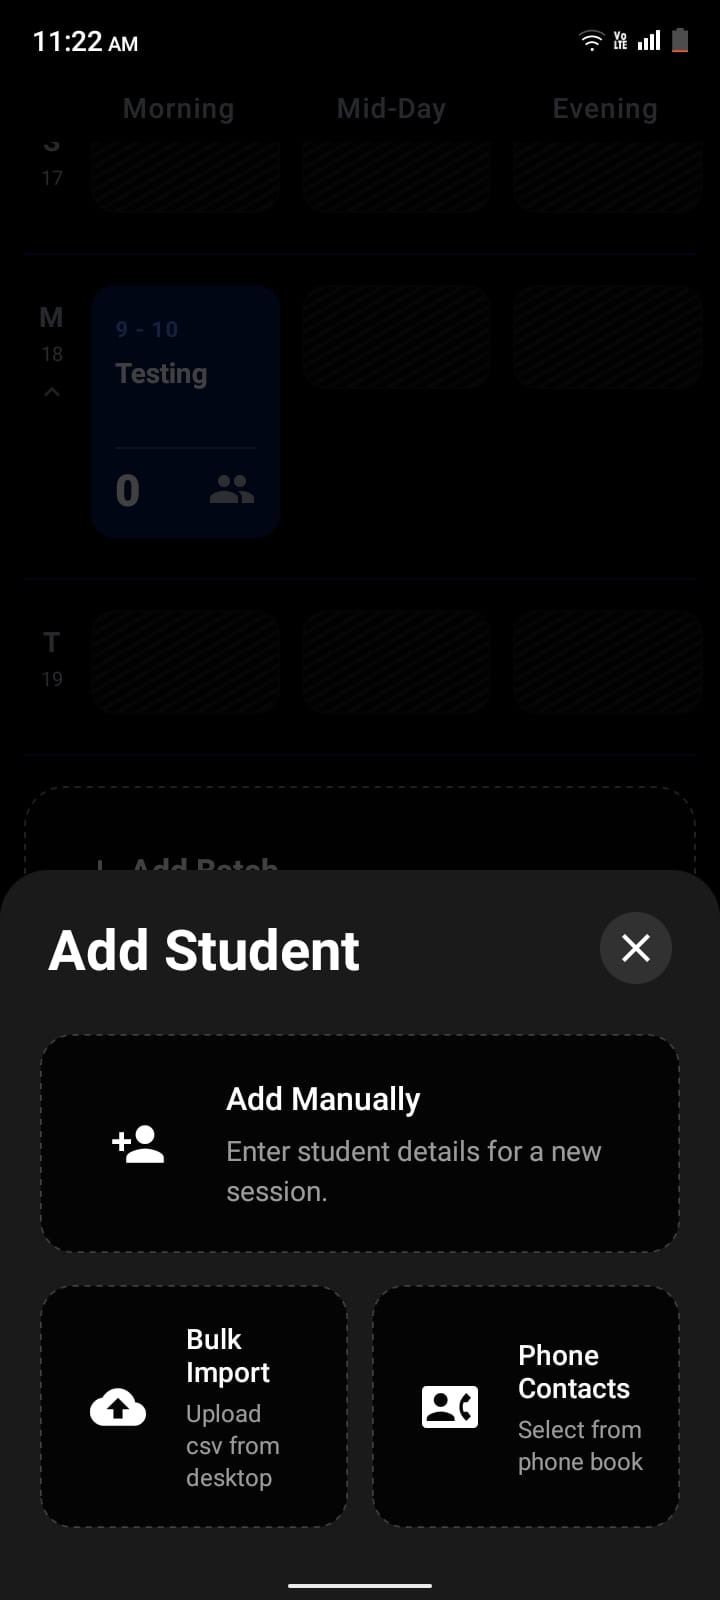
During student creation, you can:
Assign the student to a batch immediately
Select a pricing plan
Configure enrollment details
Or save the student first and enroll later
When to Use This
Building your student database
Bulk onboarding
Adding brand-new students
2. Add Students to an Existing Batch
This is one of the fastest ways to enroll students into a specific batch.
How It Works
Go to the Batches
Click the Batch card
Open the Students
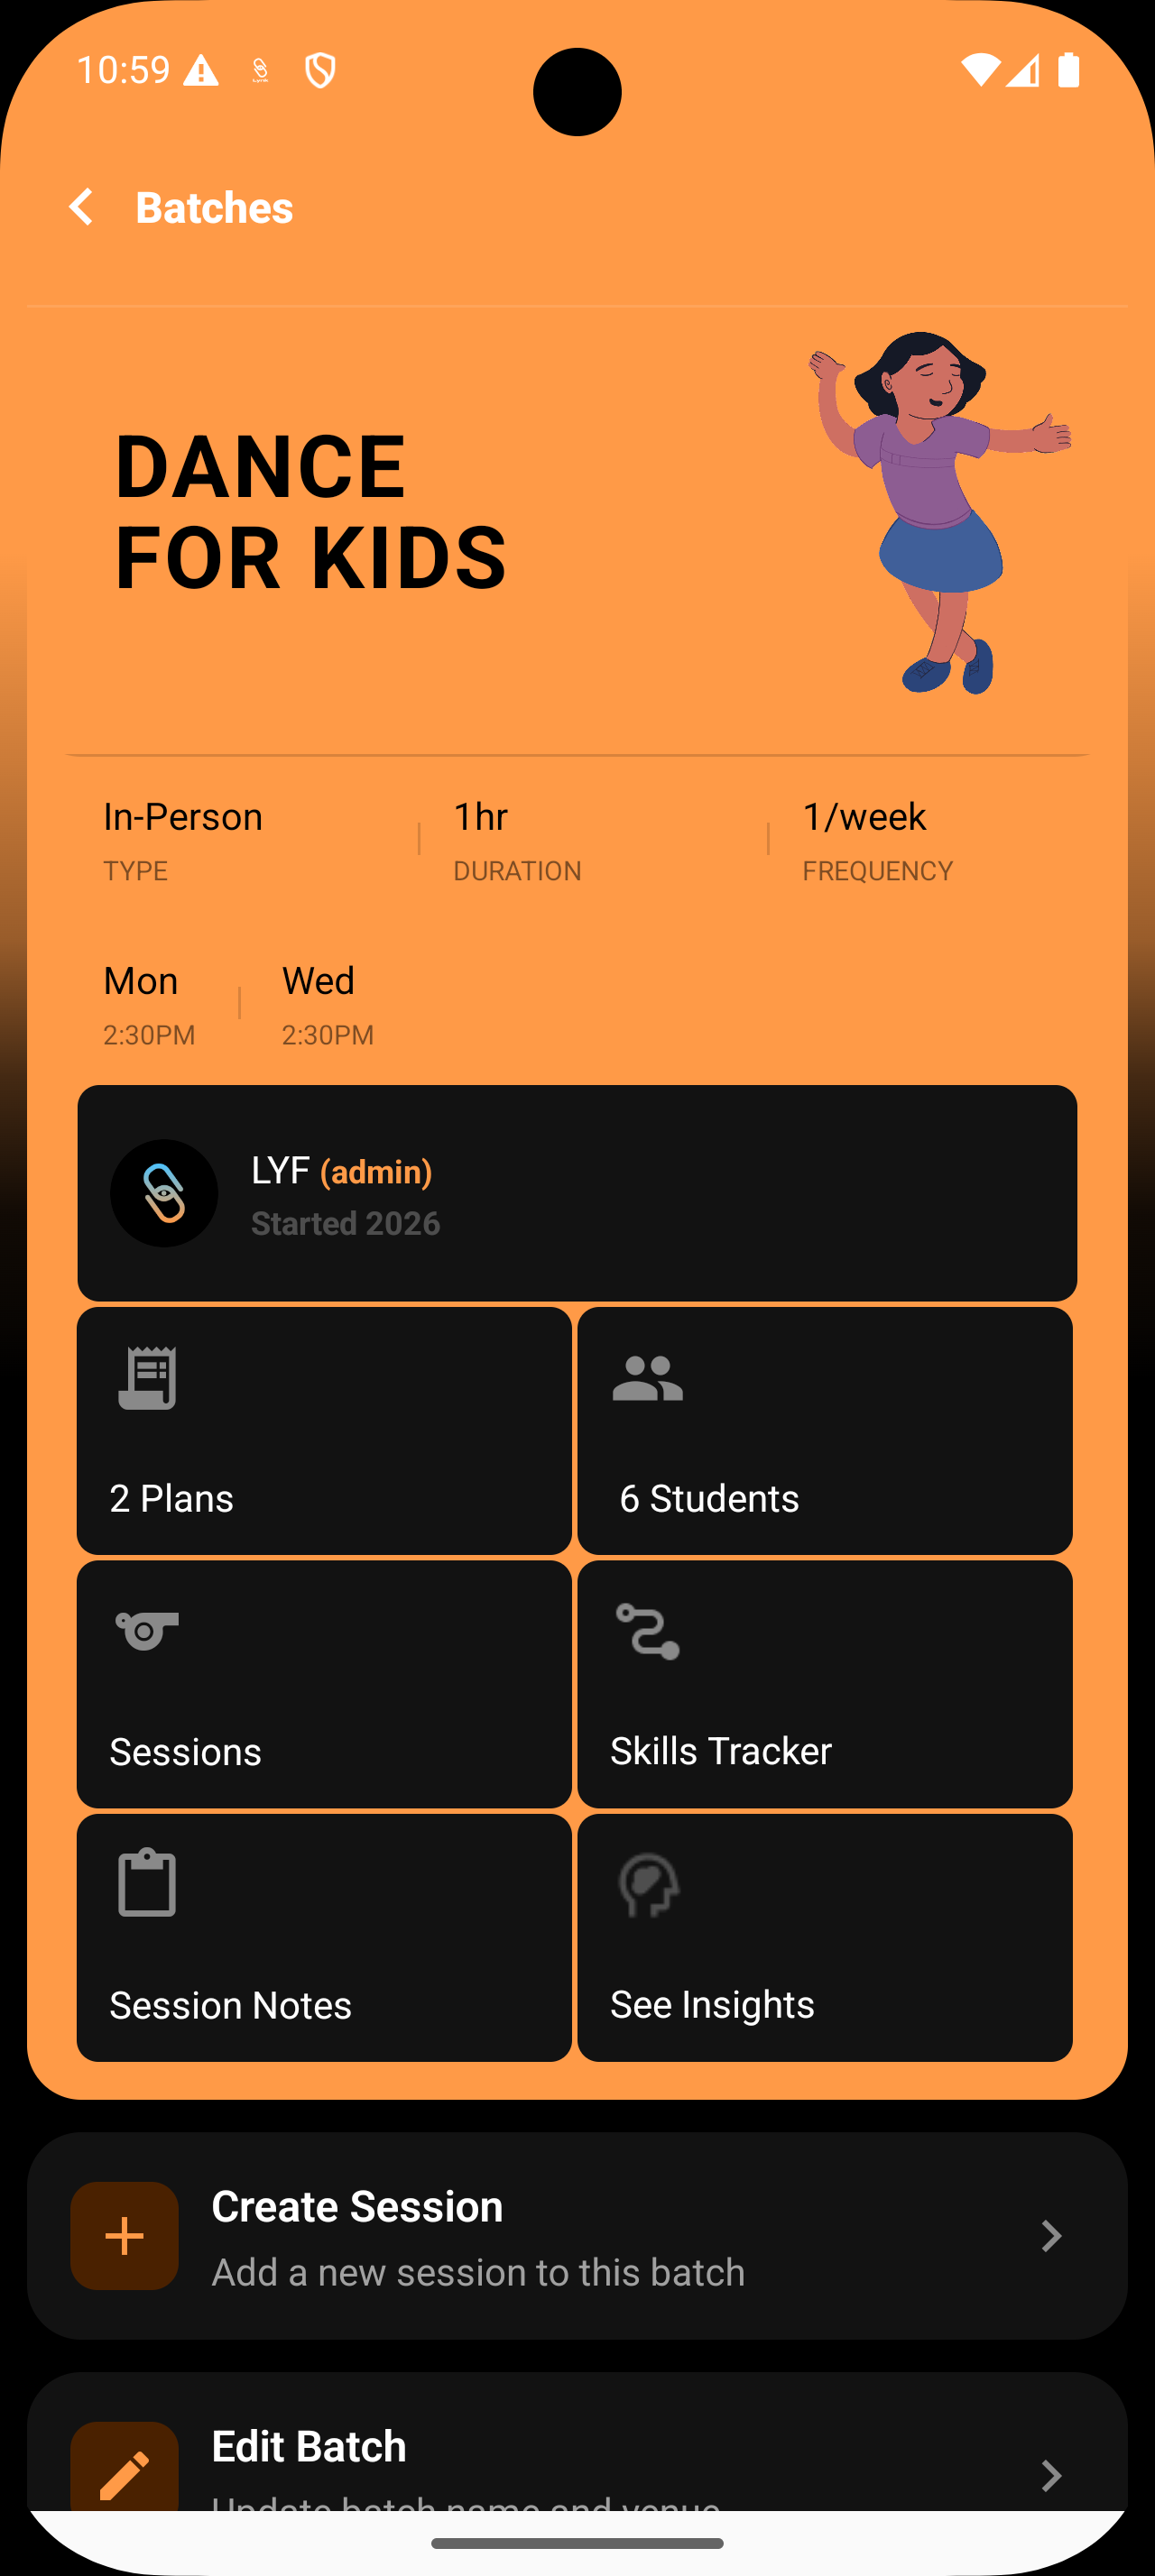
You’ll see two options:
+ Add New
+ Select from List
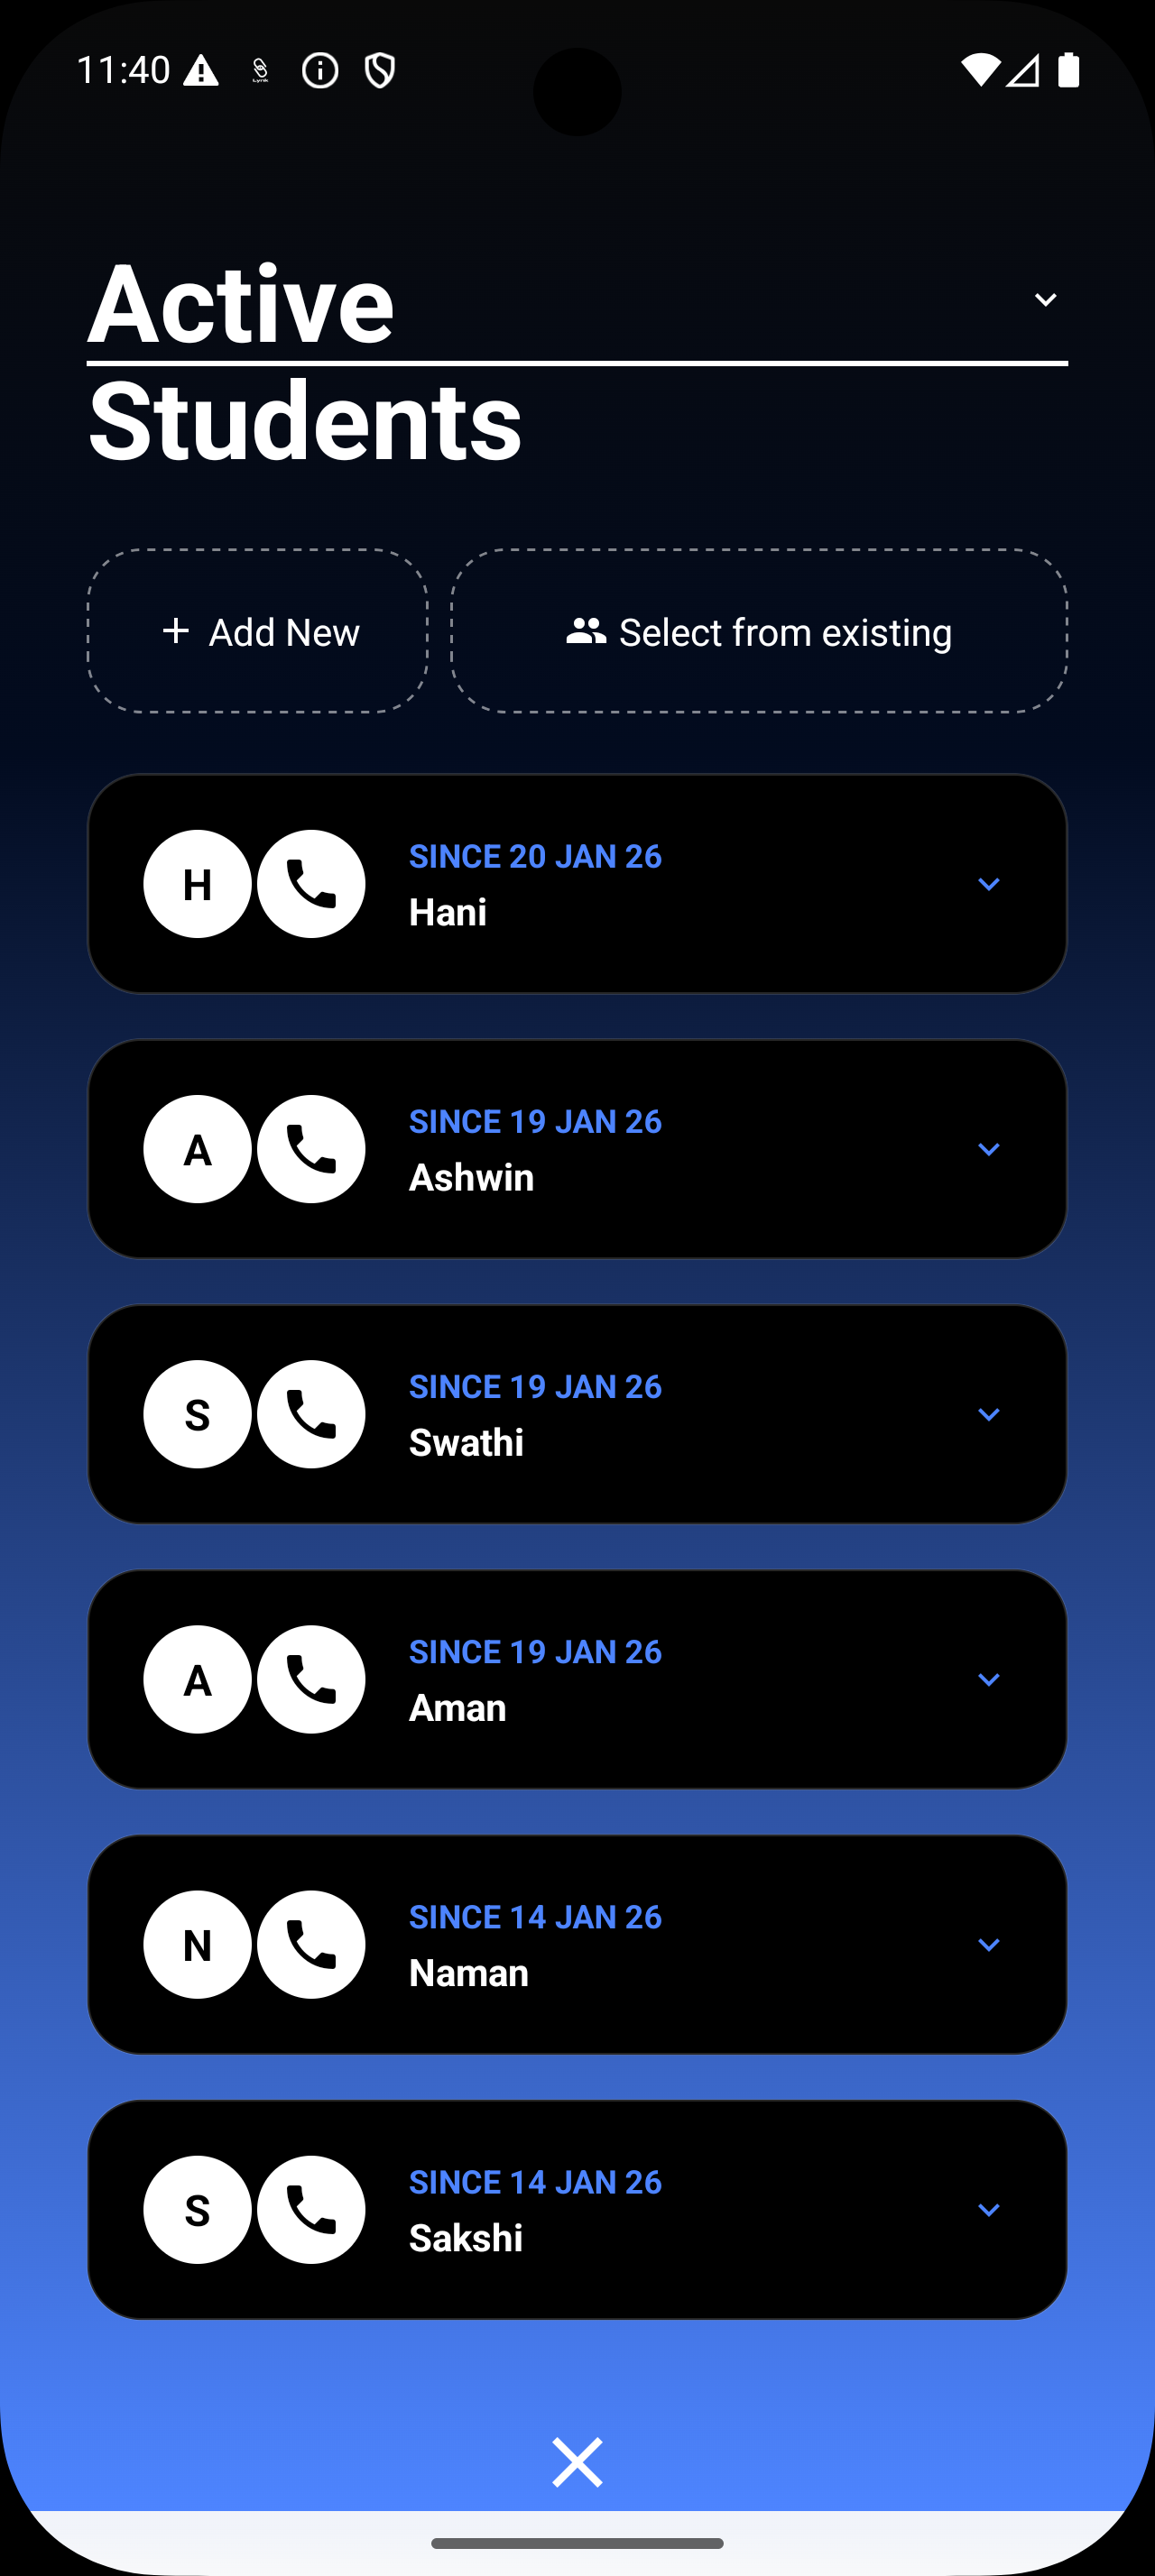
If Adding an Existing Student
Select the student
Choose the pricing plan
Click Enroll
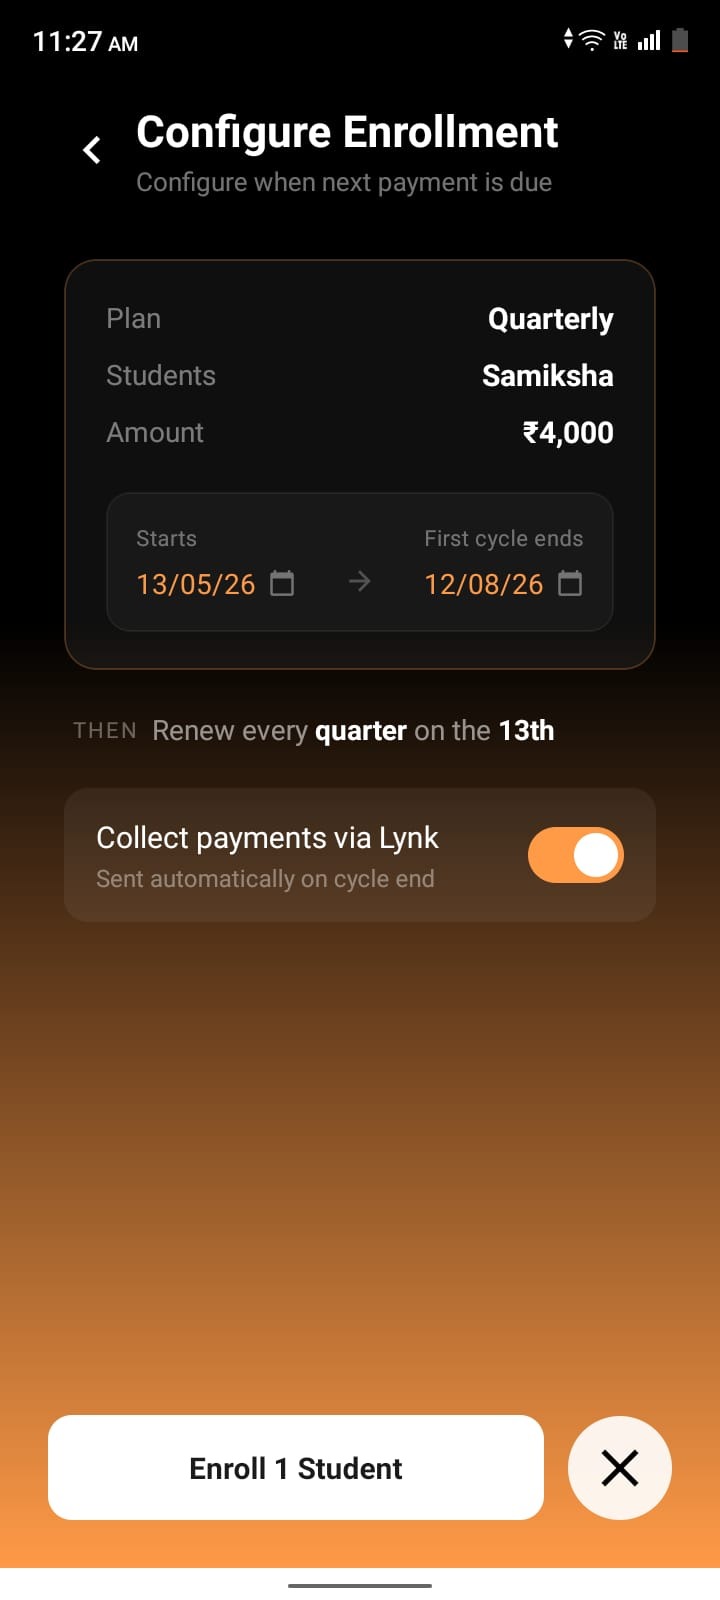
Configure Enrollment Details
Review and configure:
Student
Plan
Amount
Start date
For Duration-Based Plans
First cycle end date is auto-selected
You can edit dates for mid-cycle enrollments
For Session-Based Plans
Edit session count if required
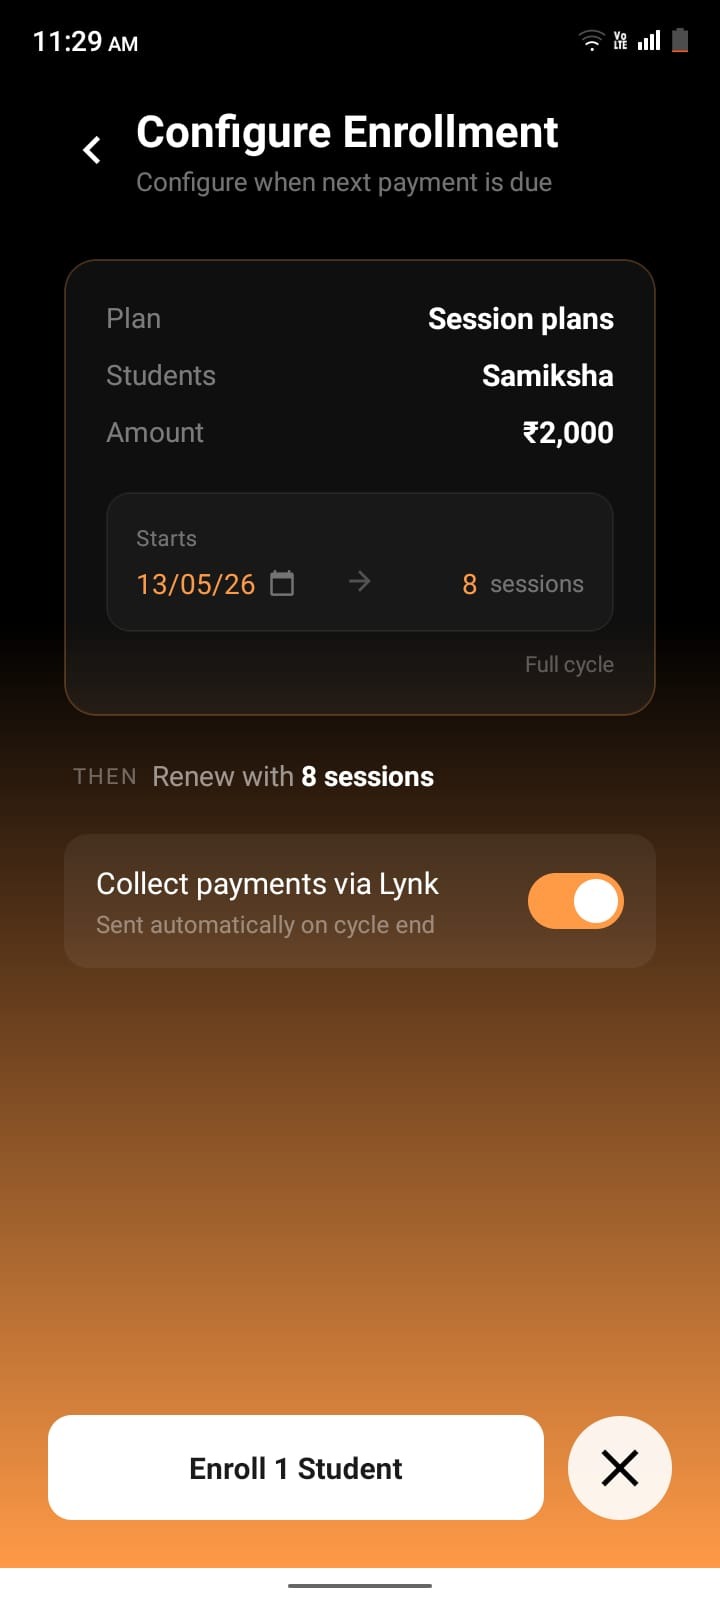
Payment Option - Toggle whether to collect payment via Lynk
Click Enroll Student
If Adding a New Student
Enter student details
Select pricing plan
Configure the same enrollment details
Click Enroll Student
When to Use This
Adding students to active batches
Filling empty batches
Expanding ongoing programs
3. Add Students to a New or Empty Batch
For newly created batches or batches with no enrolled students, Lynk provides a simple enrollment flow to help you add the first student quickly.
How It Works
Open the Batch card
Go to the Students
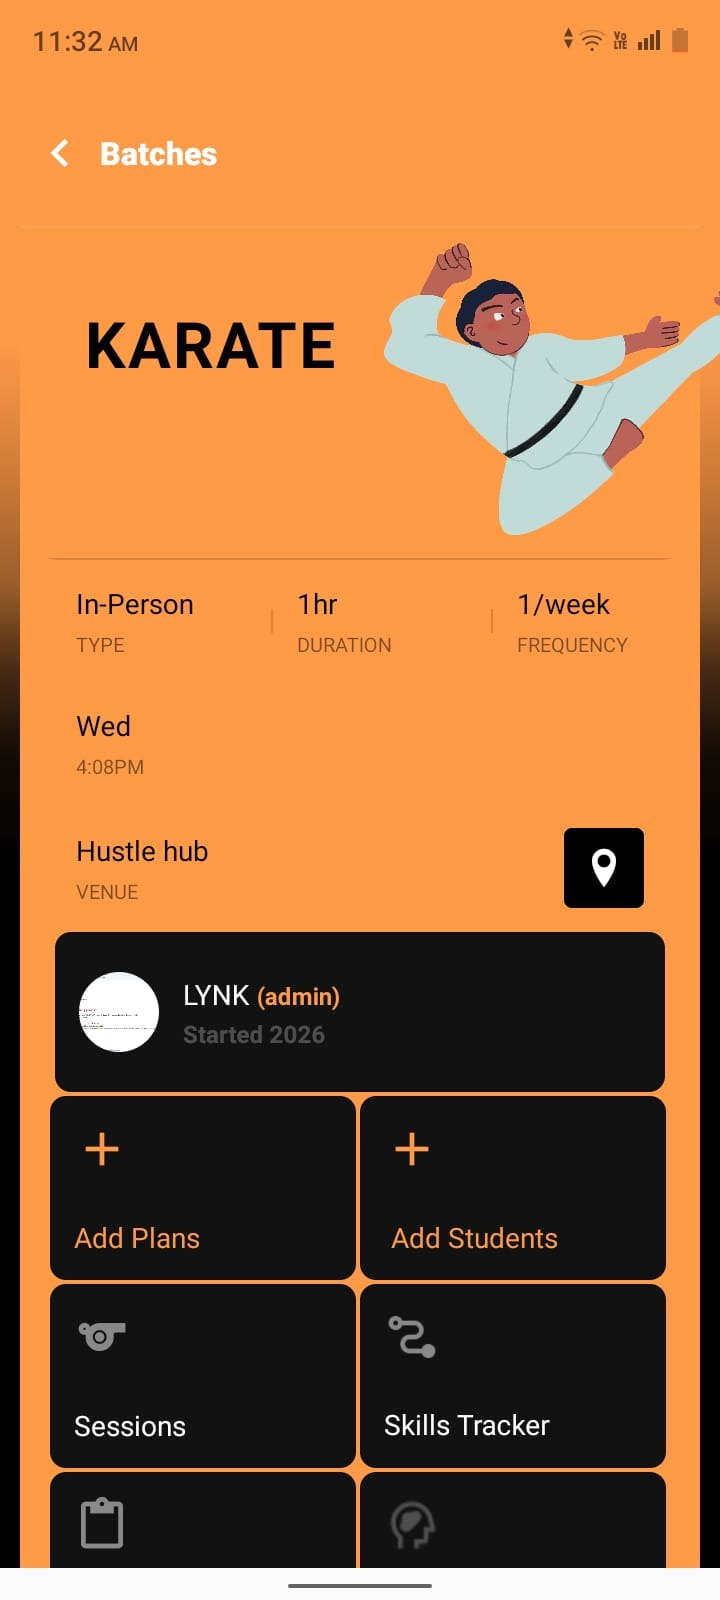
You will see two options:
Add New Student
Select from Existing
Option 1: Add a New Student
If the student is not already in your system:
Steps
Click Add New Student
Enter the student’s details:
Name
Phone number
Email address
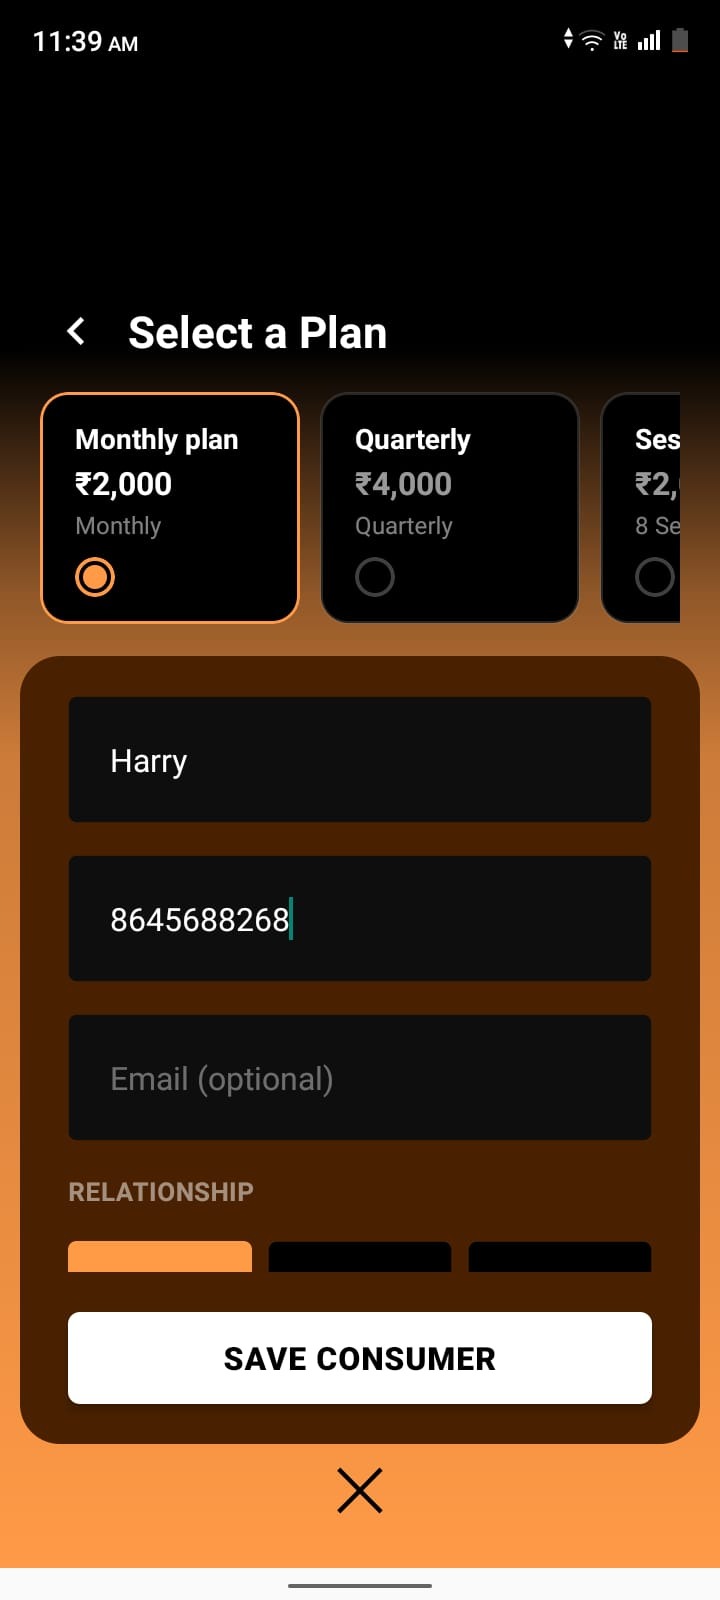
Important: Pricing Plan Required
Before enrolling, ensure that the batch already has a pricing plan attached.
You cannot add a student to a batch without selecting a pricing plan.
Select the appropriate Pricing Plan
Click Save
Configure Enrollment Details
After saving, configure:
Start date
Cycle end date (for duration-based plans) or session count (for session-based plans)
Payment via Lynk toggle
Click Enroll Student
The student profile is created and enrolled into the batch.
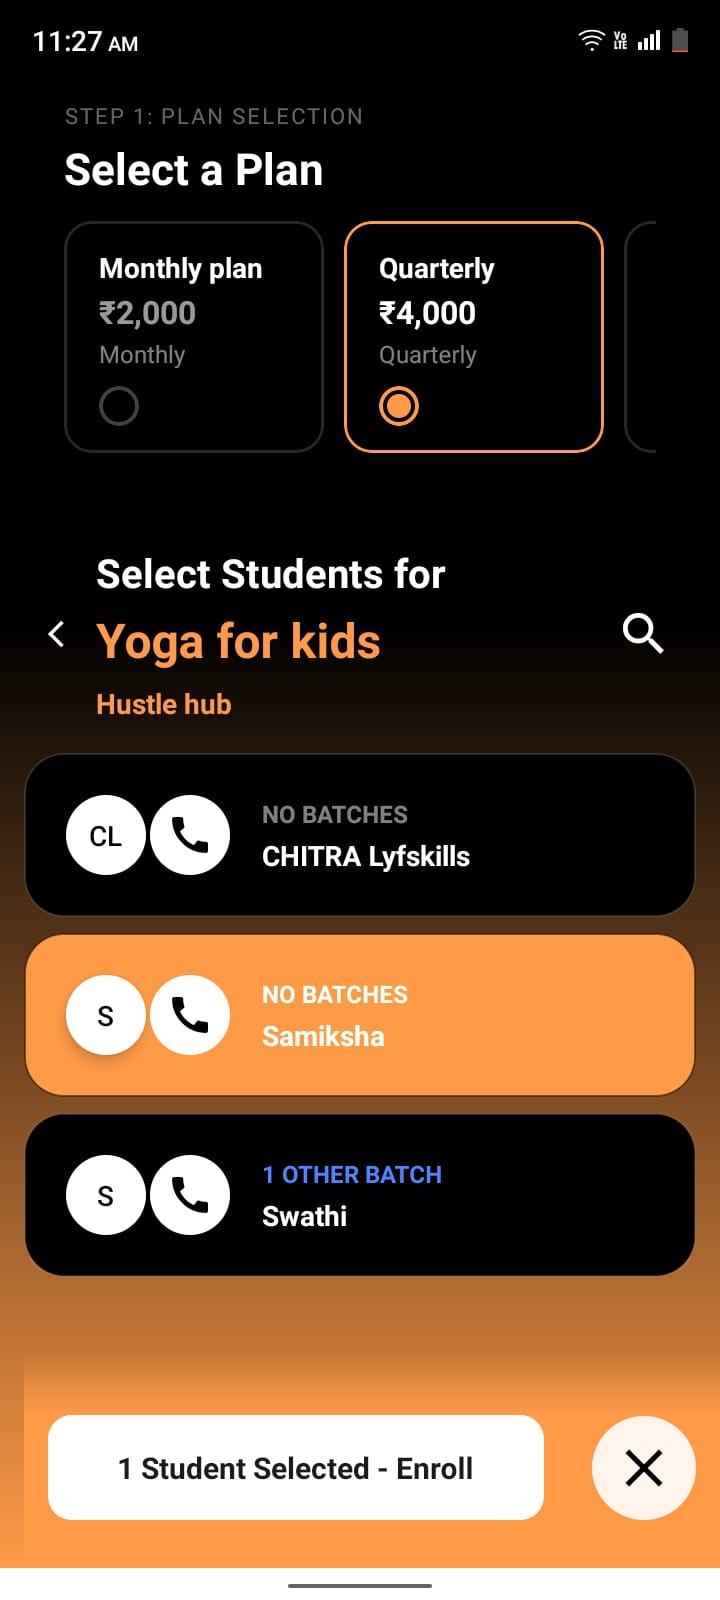
Option 2: Select from Existing
If the student already exists in your student list:
Steps
Click Select from Existing
Choose the student
Select the Pricing Plan
Configure enrollment details:
Start date
Cycle dates or session count
Payment via Lynk
Click Enroll Student
Key Things to Remember
A student can be enrolled in multiple batches
Pricing plan selection is mandatory during enrollment
Enrollment details vary based on duration or session plans
Removing a student from a batch does not remove their profile.
Summary
Lynk provides flexible ways to add students to batches based on your workflow.
No matter which method you choose, Lynk ensures enrollment, sessions, attendance, and pricing all stay connected—making student management more streamlined and accurate.