How to add students directly to a specific batch
How to add existing students or create a new student profile directly from a batch and manage student actions such as attendance, editing details, pausing, or removing them.
Written by Swathi N
Add existing students or create new student profiles directly from a batch and manage their enrollment, attendance, and participation.
You can add students directly to a batch by opening the batch and accessing the Students section. This allows you to enroll students, assign pricing plans, and manage their activity within that batch.
You can either:
Add an existing student
Create and enroll a new student
Accessing the Students Section in a Batch
To add students to a batch:
Go to the Batches tab in Lynk Tower.
Select the batch where you want to add students.
This will open the batch card directly.
Navigate to the Students section
Here you will see the list of students currently enrolled in that batch.
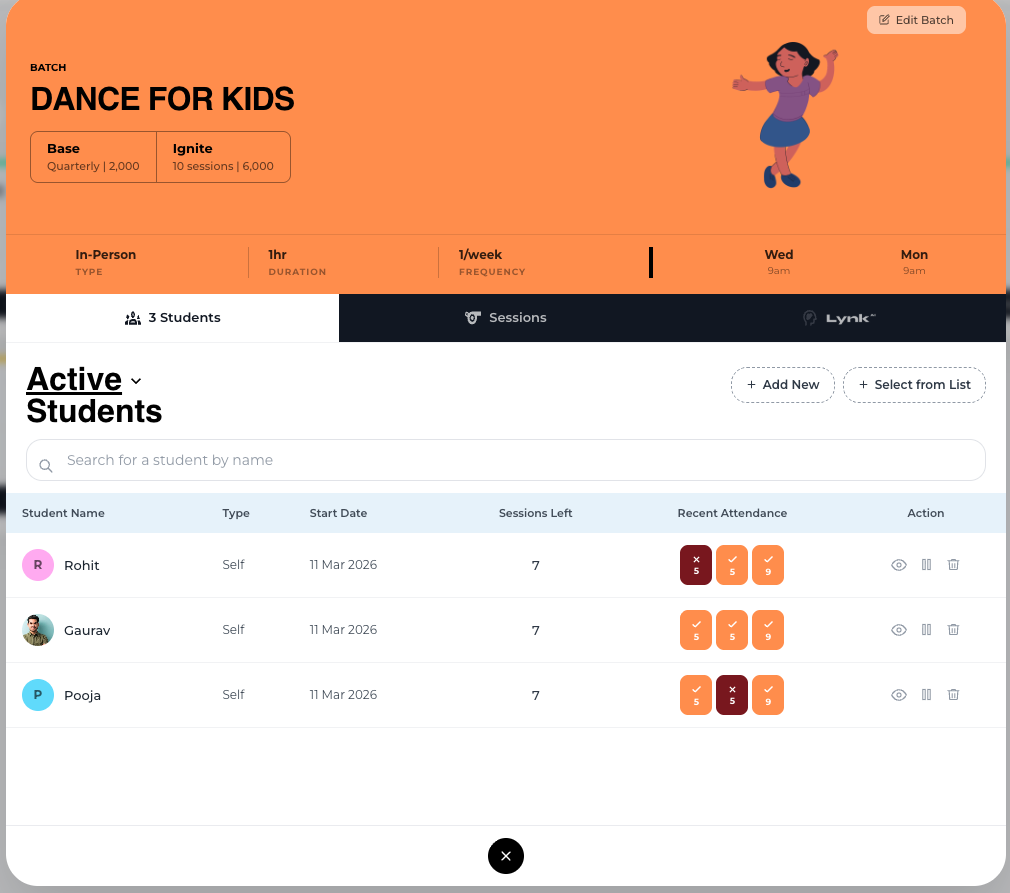
Adding an Existing Student
If the student already exists in your system, follow these steps:
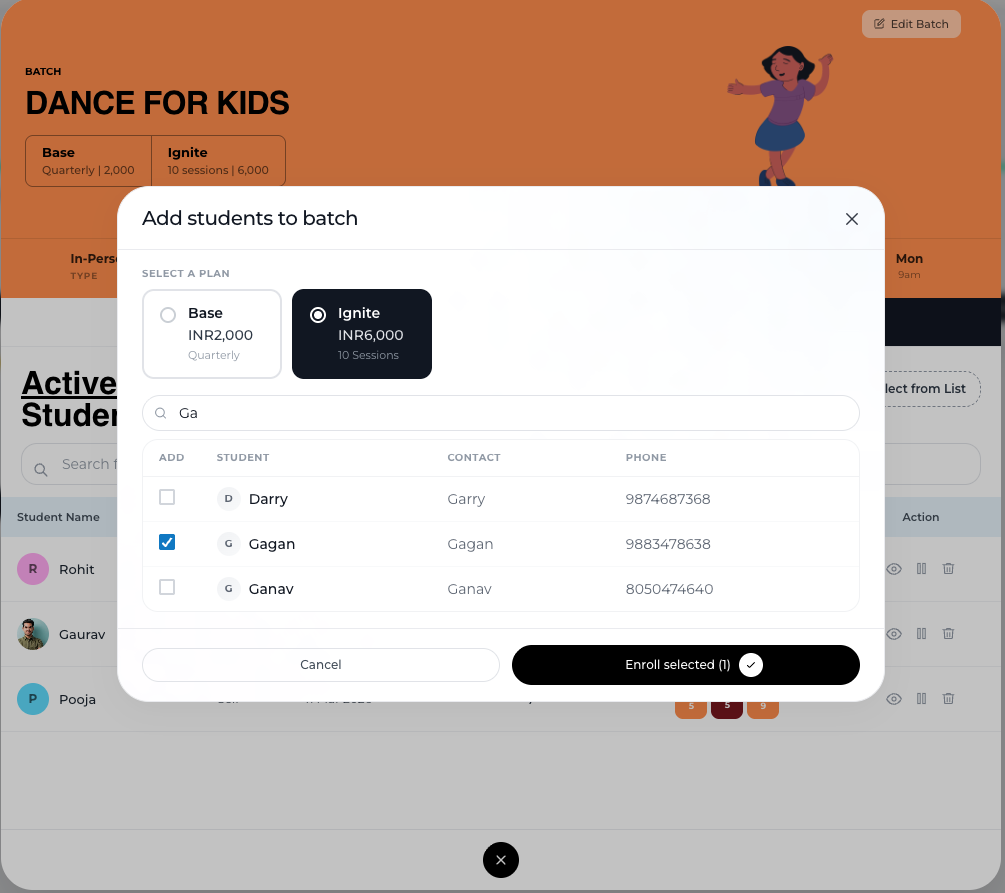
Steps to Add an Existing Student
Click + Select from List
Search and select the student
Choose the pricing plan for enrollment
Configure Enrollment Details
After selecting the plan, you will be taken to the Enrollment Details screen, where you can review and configure:
Student name
Selected plan
Amount
Set Enrollment Dates
Start Date – Select when the student’s plan begins
First Cycle End Date – Automatically set based on the plan
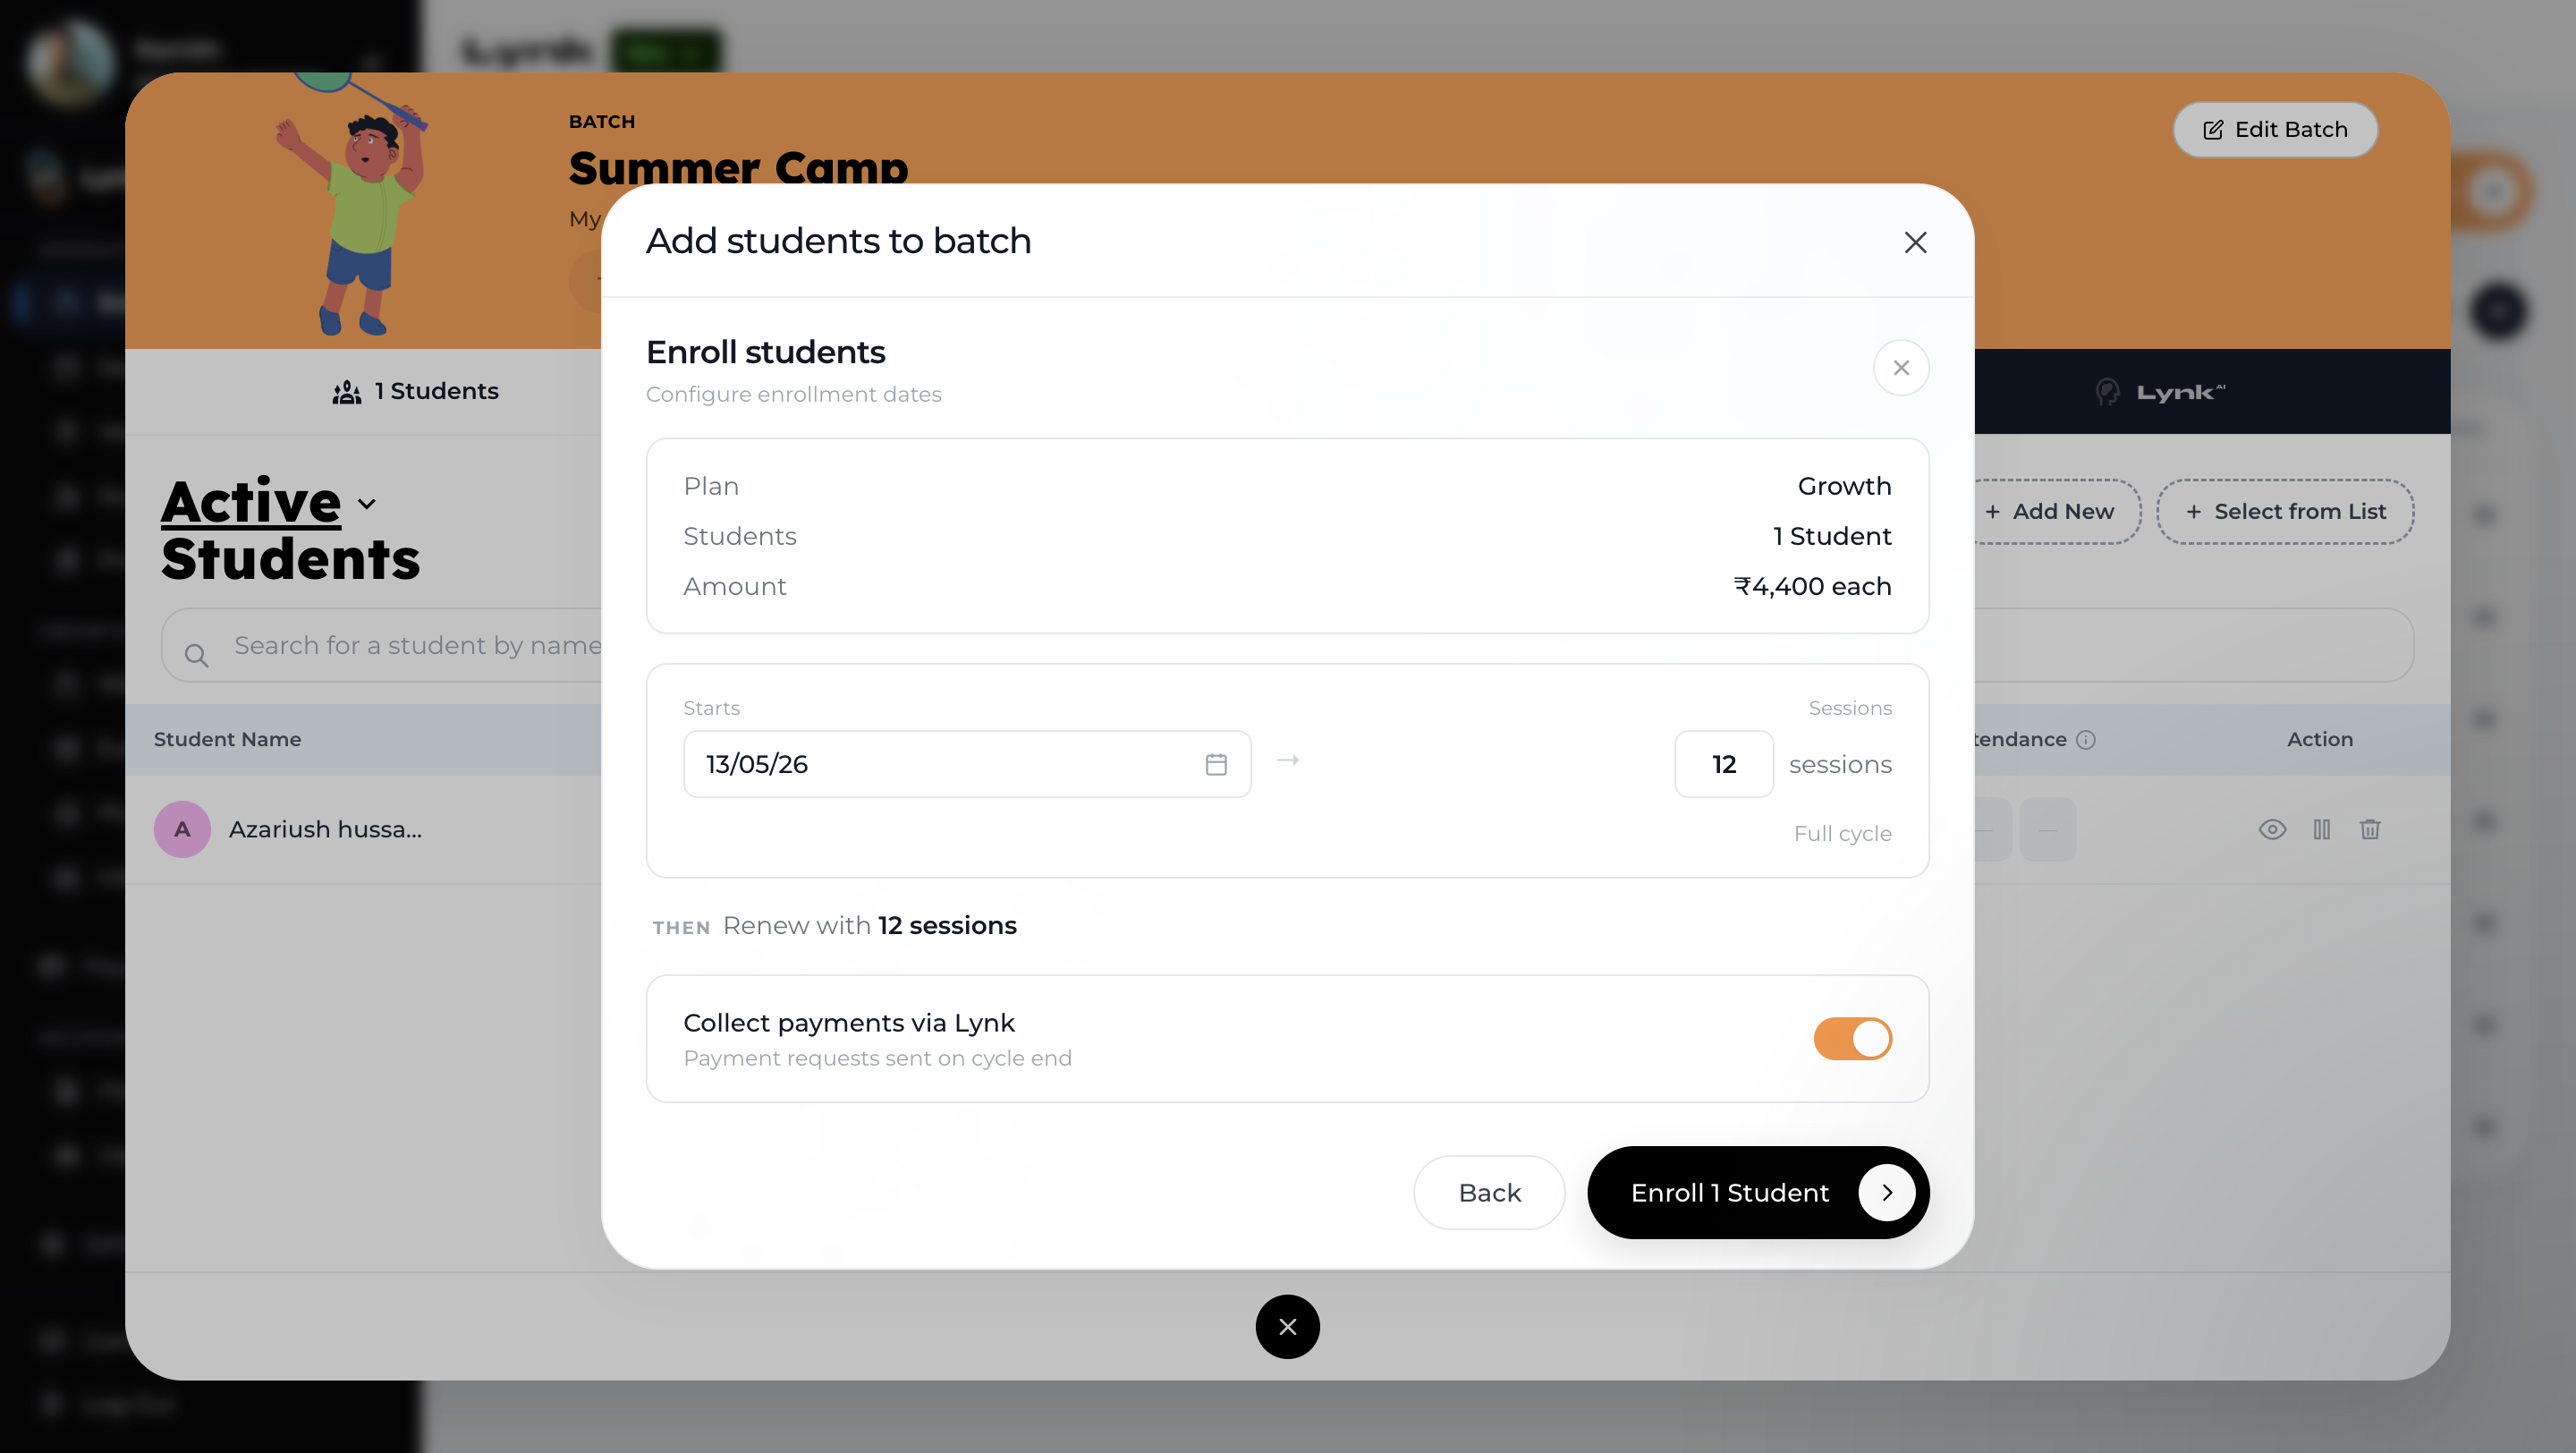
You can modify these in certain cases:
For duration-based plans:
Adjust start or end date for mid-cycle enrollments
For session-based plans:
Edit the number of sessions if required
Payment Option
Toggle whether to collect payment via Lynk or not
Click Enroll Student
The student will now be added to the batch with the selected plan.
Adding a New Student
If the student does not exist:
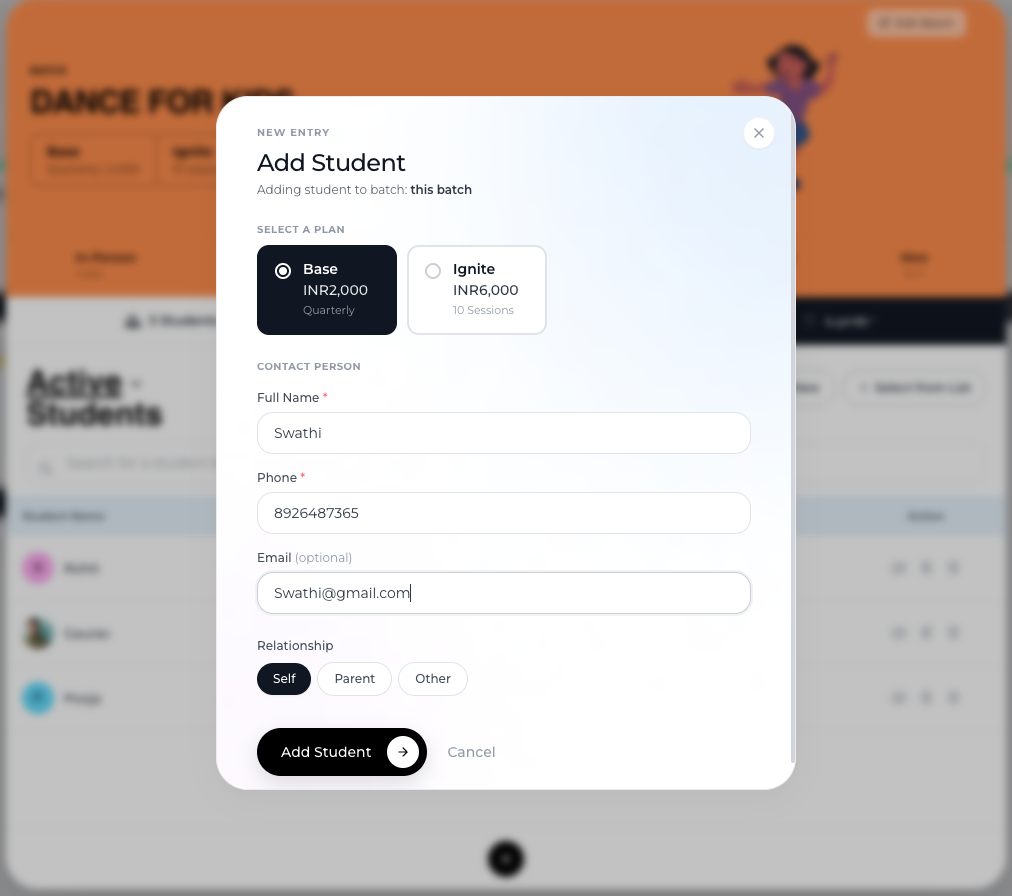
Steps to Add a New Student
Click + Add New
Enter the student’s basic details
Select a pricing plan
Configure enrollment details
Start date
End date / sessions
Payment option
Click Enroll Student
The new student will be created and enrolled in the batch.
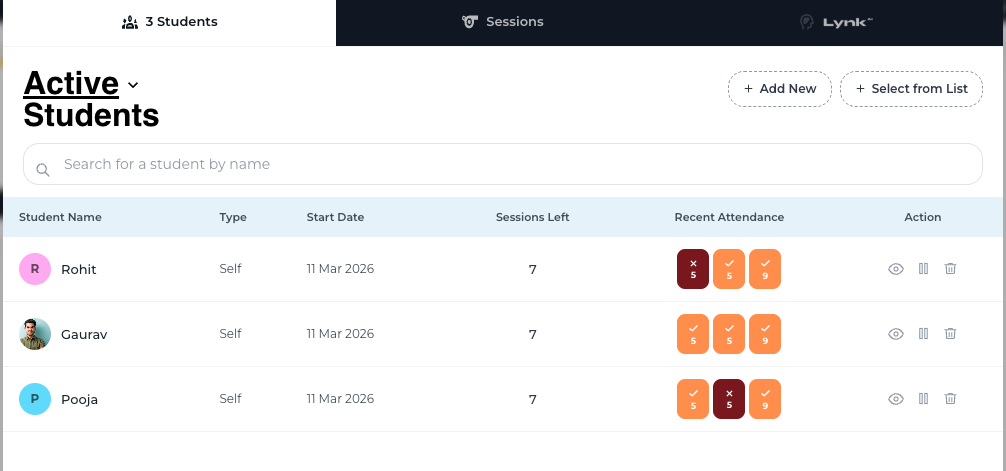
Viewing Student Details
Once enrolled, you can view:
Student name
Start Date
Plan details
Remaining Session or duration details
This helps you track student participation and plan usage.
Viewing Student Attendance
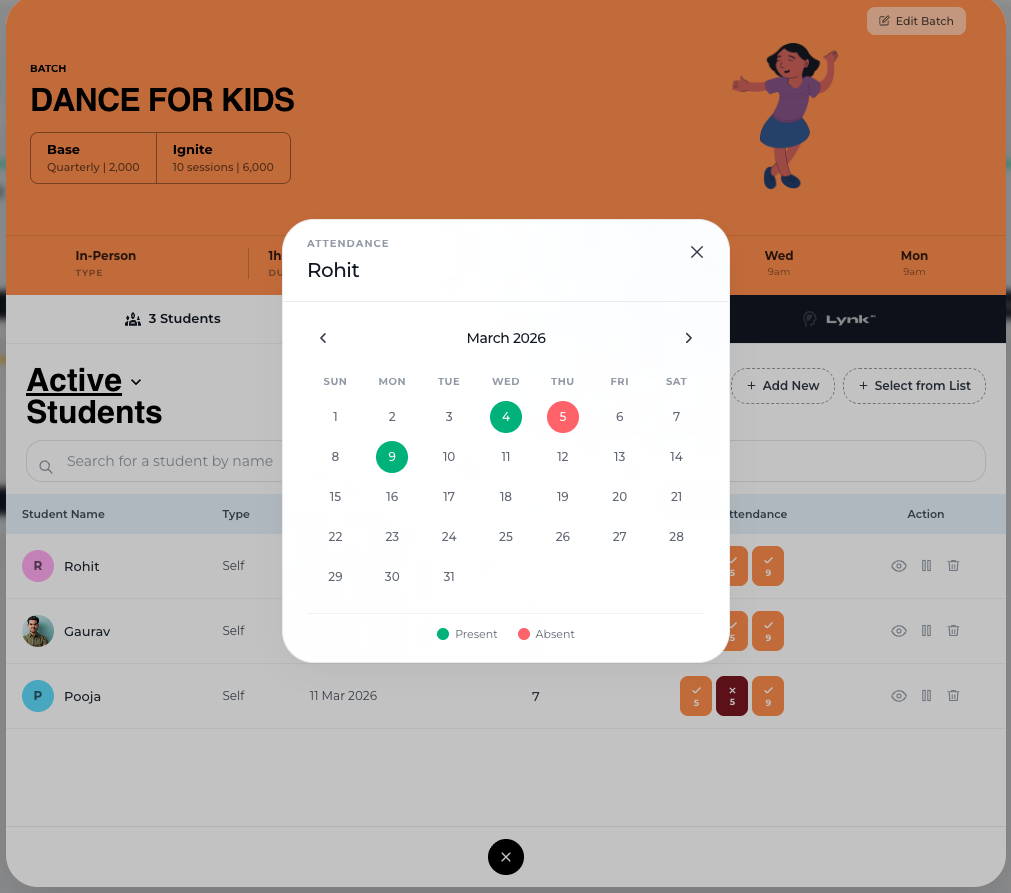
You can quickly view a student’s attendance directly from the batch.
To check attendance: Click the eye icon in the Action column
This opens a calendar view showing:
Present sessions
Absent sessions
Managing Student Actions
From the Action column, you can:
Pause Student
The Pause option temporarily pauses the student’s participation in the batch.
Remove Student
The Remove option removes the student from the batch.
These options help you manage student enrollments efficiently without affecting the rest of the batch.
Conclusion
The Students section makes it easy to add and manage students directly within a batch. By adding existing students, creating new profiles, tracking attendance, and performing actions such as pause or remove students, you can efficiently manage student participation and keep your batch organized.