How to create a pricing plan
Set up how and when you charge for your batches
Written by Swathi N
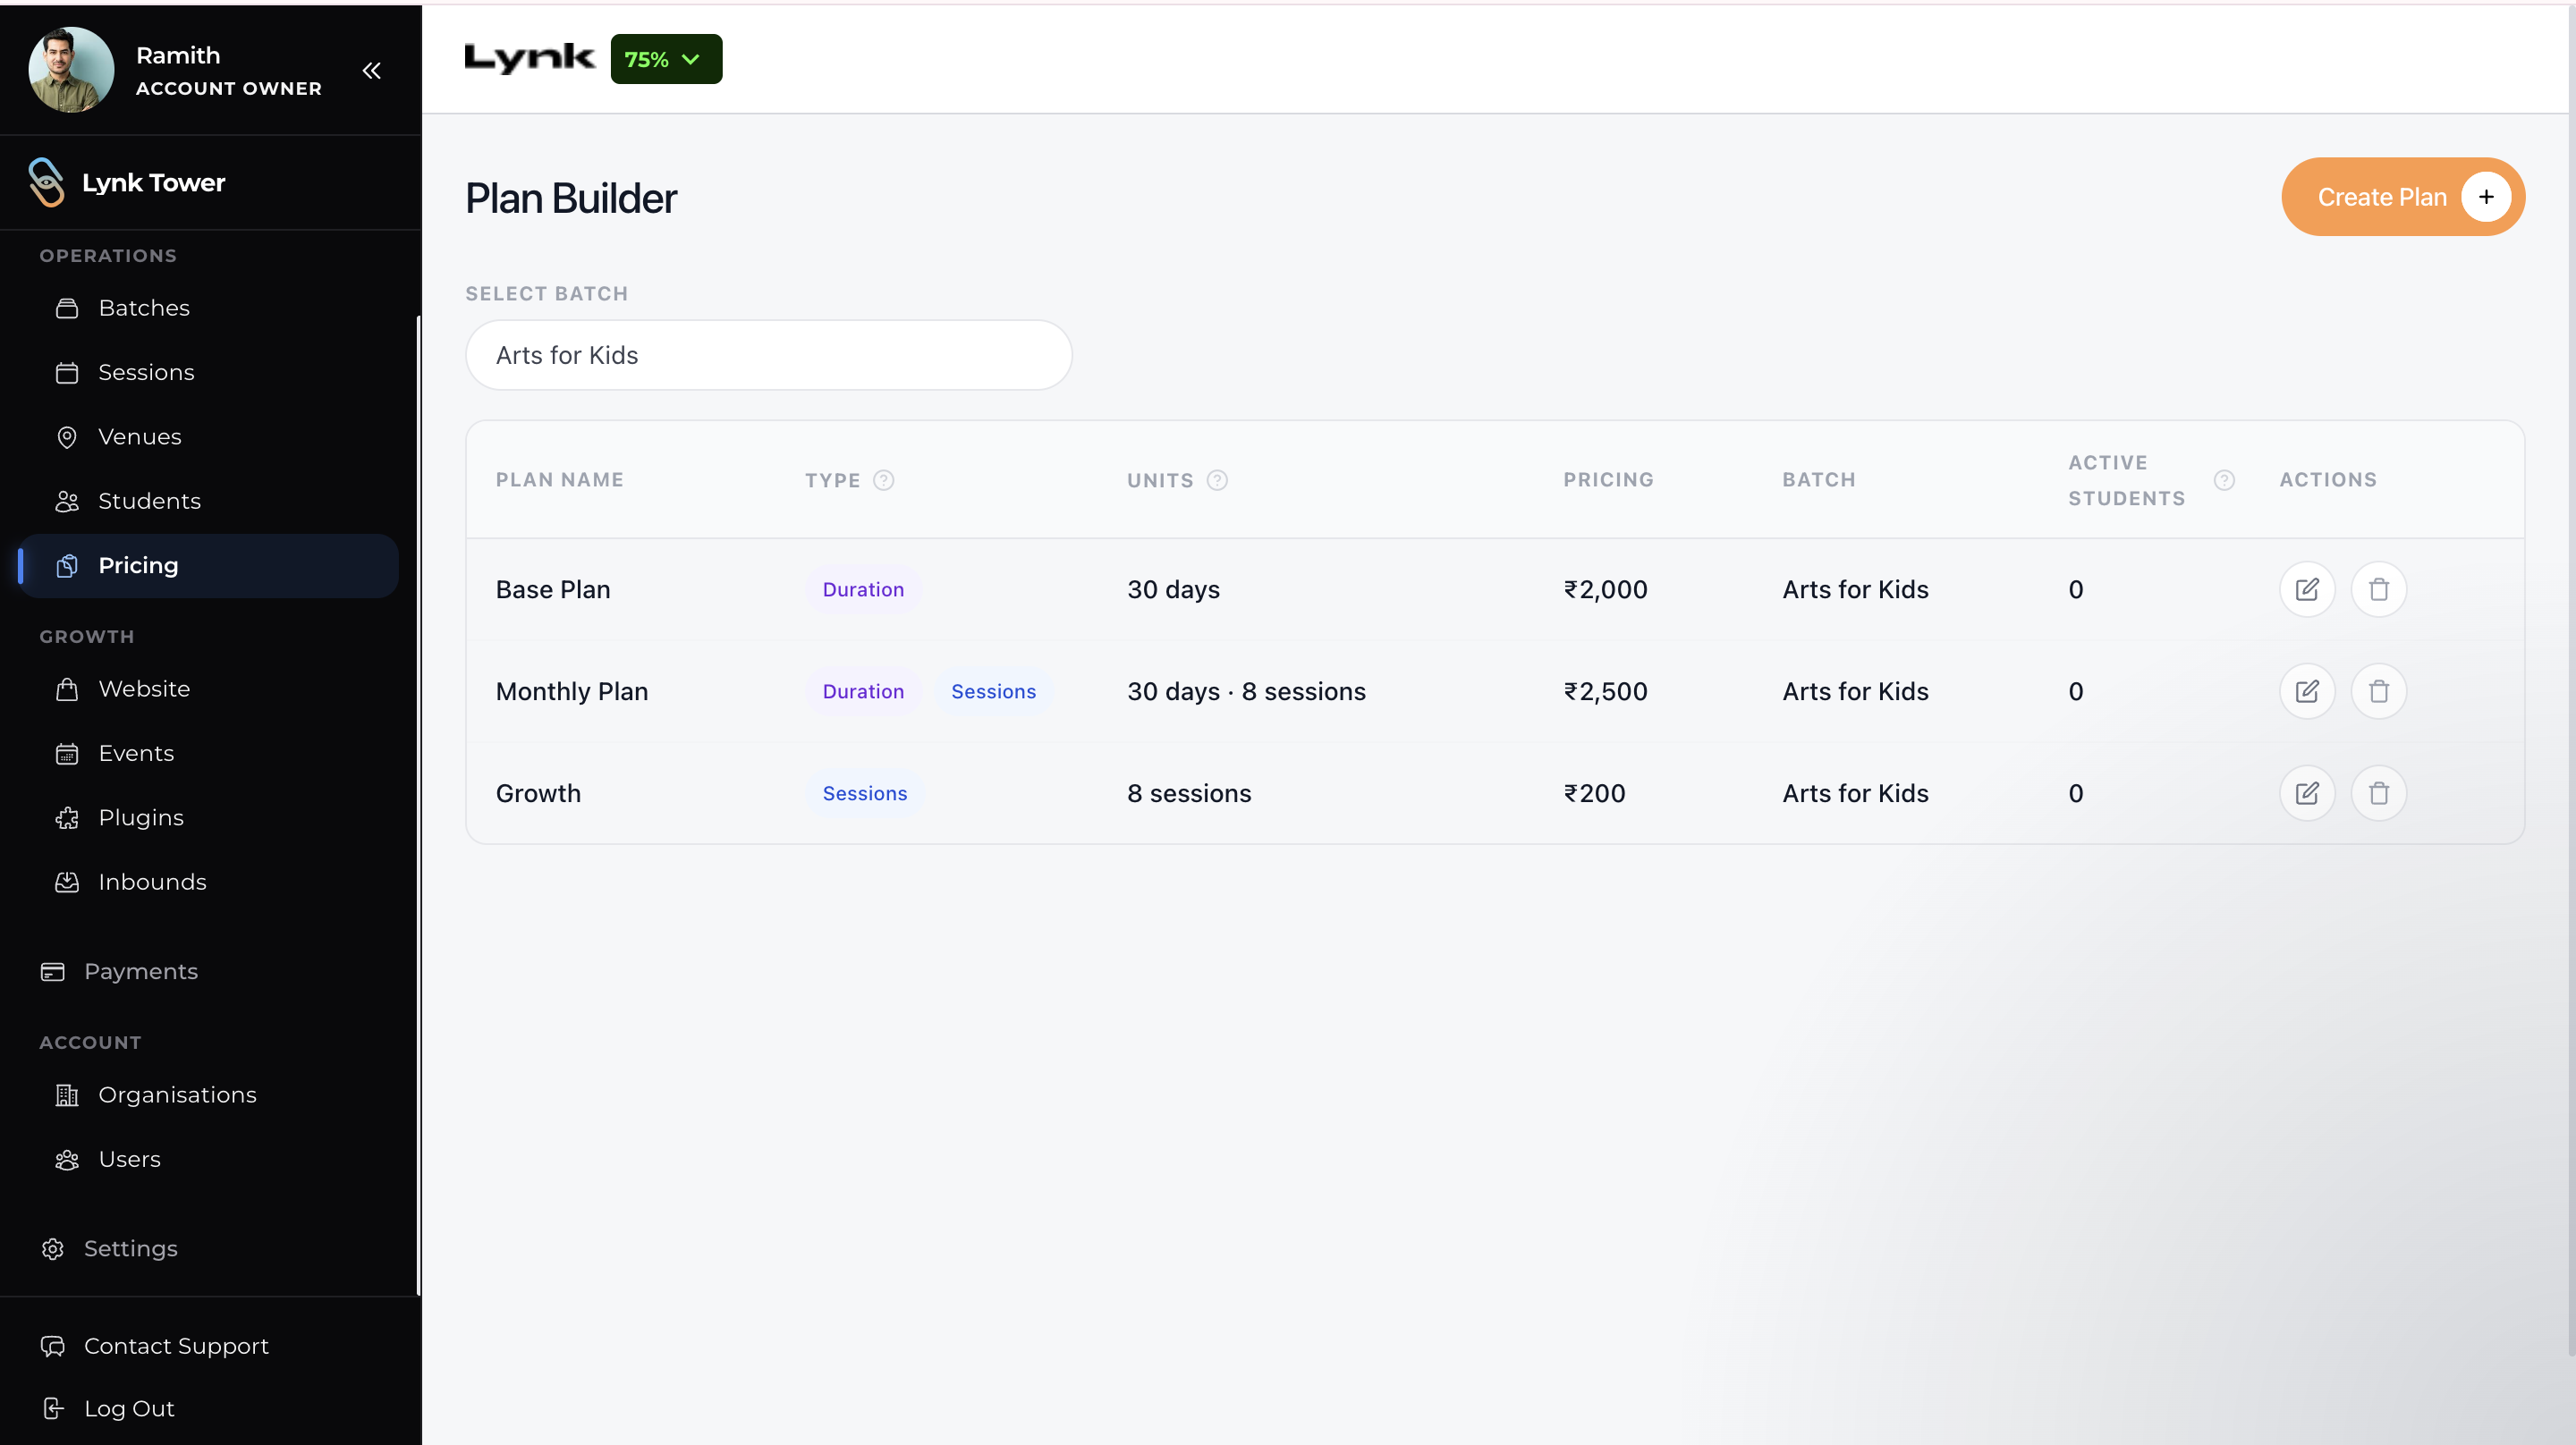
In Lynk Tower, the Plan Builder allows you to create and manage pricing plans for your classes. These plans define how students are charged—based on duration or number of sessions—and are linked directly to specific batches.
This helps you structure your fees clearly and offer flexible pricing options to students.
What is the Plan Builder?
The Plan Builder is the section where you create and manage all your pricing plans.
Using this, you can:
Create plans for different batches
Define pricing based on duration or sessions
Set clear fee structures for your programs
Manage active and inactive plans
Each plan is linked to a specific batch, ensuring that students see the correct pricing for the class they are enrolling in.
When Should You Create a Pricing Plan?
You should create a pricing plan when:
You launch a new batch or program
You want to offer multiple pricing options (e.g., monthly vs session pack)
You need to define clear fee structures for students
You want to attach pricing to your storefront for online purchases
Each batch can have one or more pricing plans depending on your offering.
Creating a New Pricing Plan
To create a pricing plan:
Navigate to the Pricing section.
Click on Create Plan.
This will open the plan creation form where you can configure all the required details.
Assigning the Plan to Batch
The first step is to select the batches for which the plan is being created.
Click on the Batches dropdown
You can select one or multiple batches
The plan will be applicable to all selected batch
Setting Plan Details
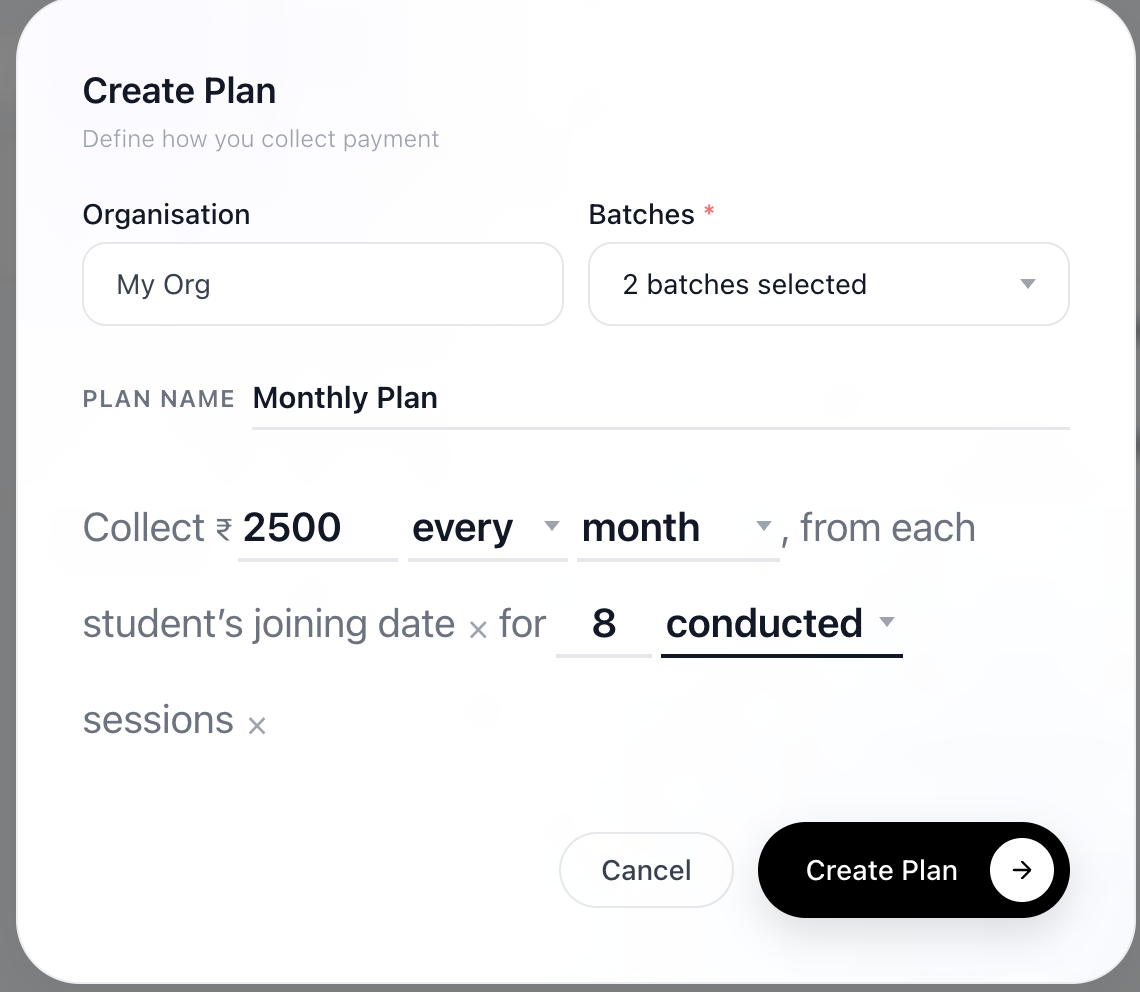
While creating the plan, you need to configure the following:
Plan Label
Give a name or label to the plan
Example: Monthly Plan, 10 Sessions Pack, Beginner Program Fee
This helps identify the plan easily.
Define Pricing Logic
You can configure pricing in three ways:
Duration-Based (time-based billing)
Session-Based (per session billing)
Combination of Both (time + session conditions)
A. Enter Amount
Add the ₹ amount you want to charge
This is the base value that will be applied based on your selected logic.
B. Duration-Based Pricing
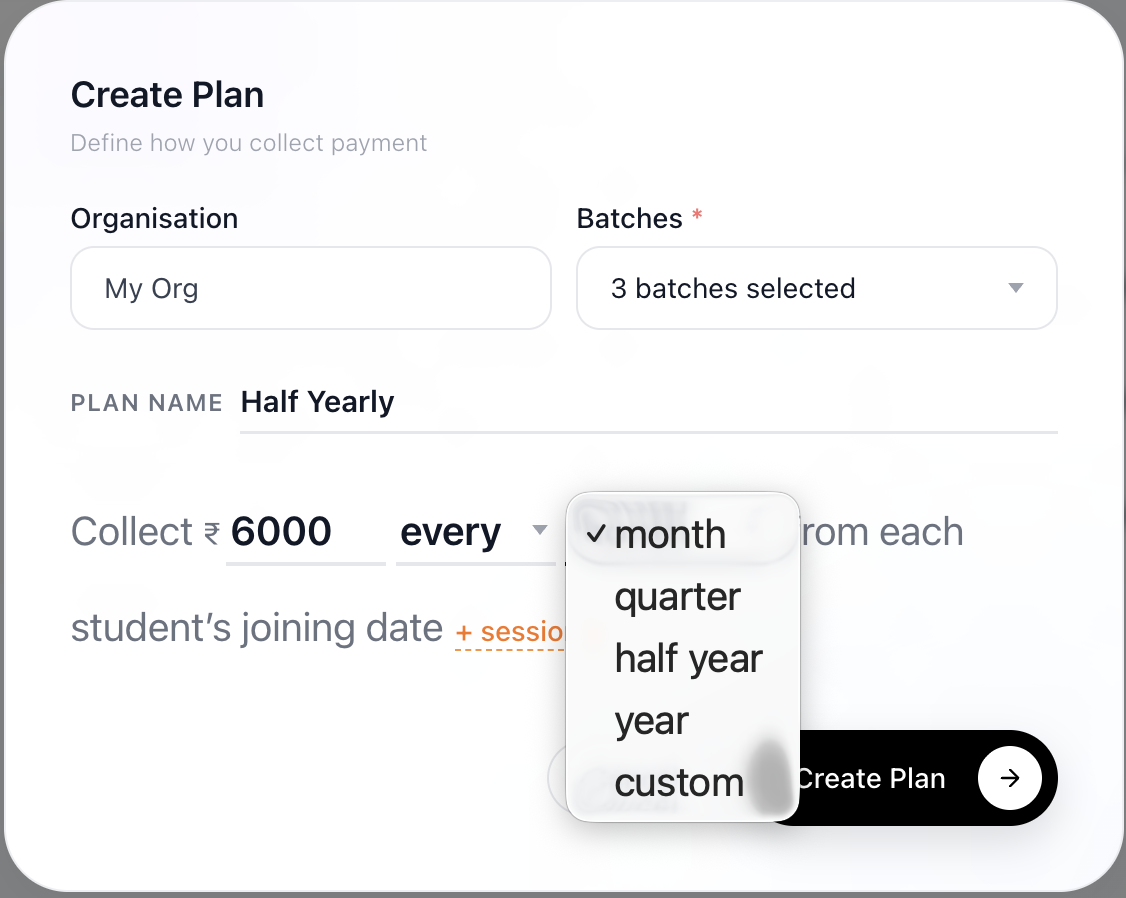
Decide how often you want to collect payments:
Every month
Every quarter
Every half year
Every year
Custom intervals
Choose Billing Trigger
You can define when the charge should be applied:
Option 1: Relative to Student Joining
Charges are calculated from each student’s joining date, then choose to “every”
Example:
Collect every month from student’s joining date
Option 2: Fixed Calendar Date
Charges are applied on a specific date cycle, then choose to “on the” and define the date.
Example:
Collect on the 1st of every month/quarter
C. Session-Based Pricing
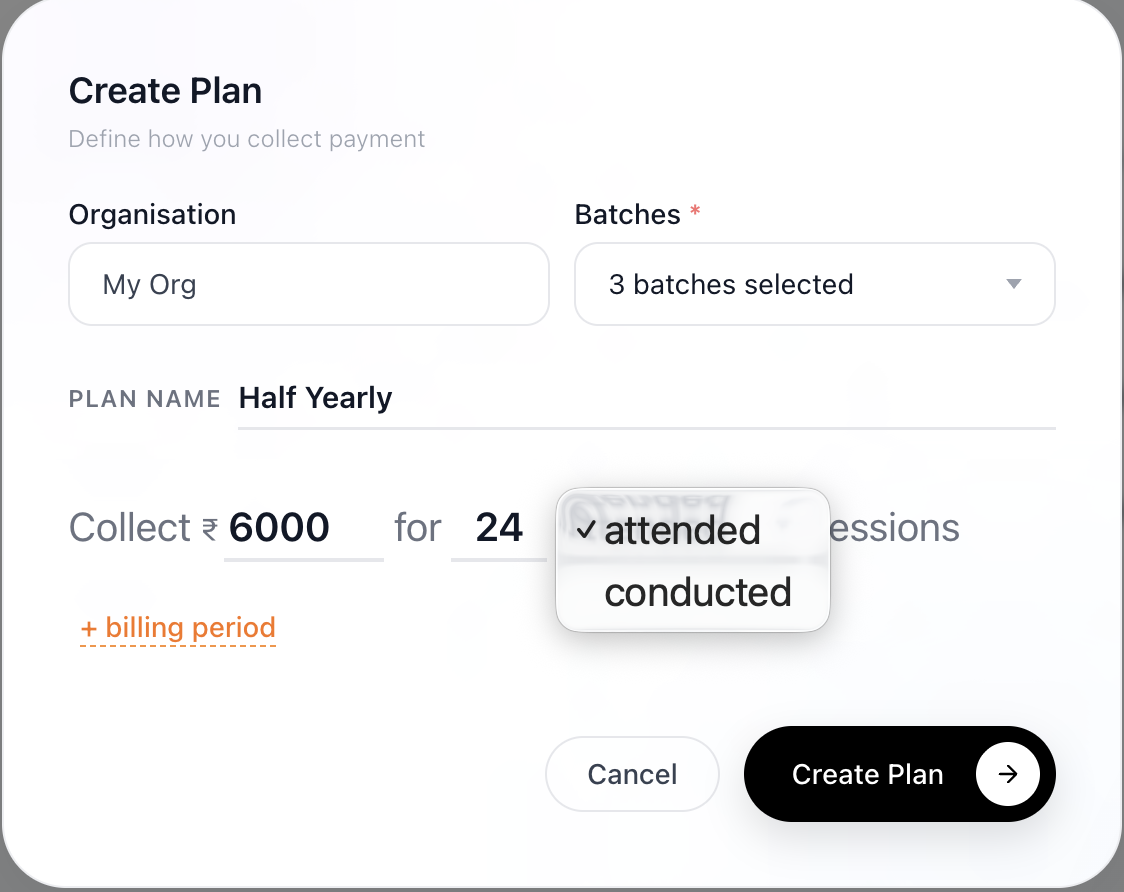
Select Number of Sessions
You must specify the number of sessions included in the plan
Examples:
8 sessions pack
12 sessions pack
This defines the total sessions the student is paying for.
Choose Session Rule
Define how sessions are counted:
Conducted sessions
Attended sessions
Difference:
Conducted: Charges apply to all scheduled sessions, regardless of attendance
Attended: Charges apply only when the student is present
D. Combine Duration + Sessions
You can combine both rules to create more precise pricing.
Examples:
Collect ₹2000 every month from each student’s joining date for 8 attended sessions
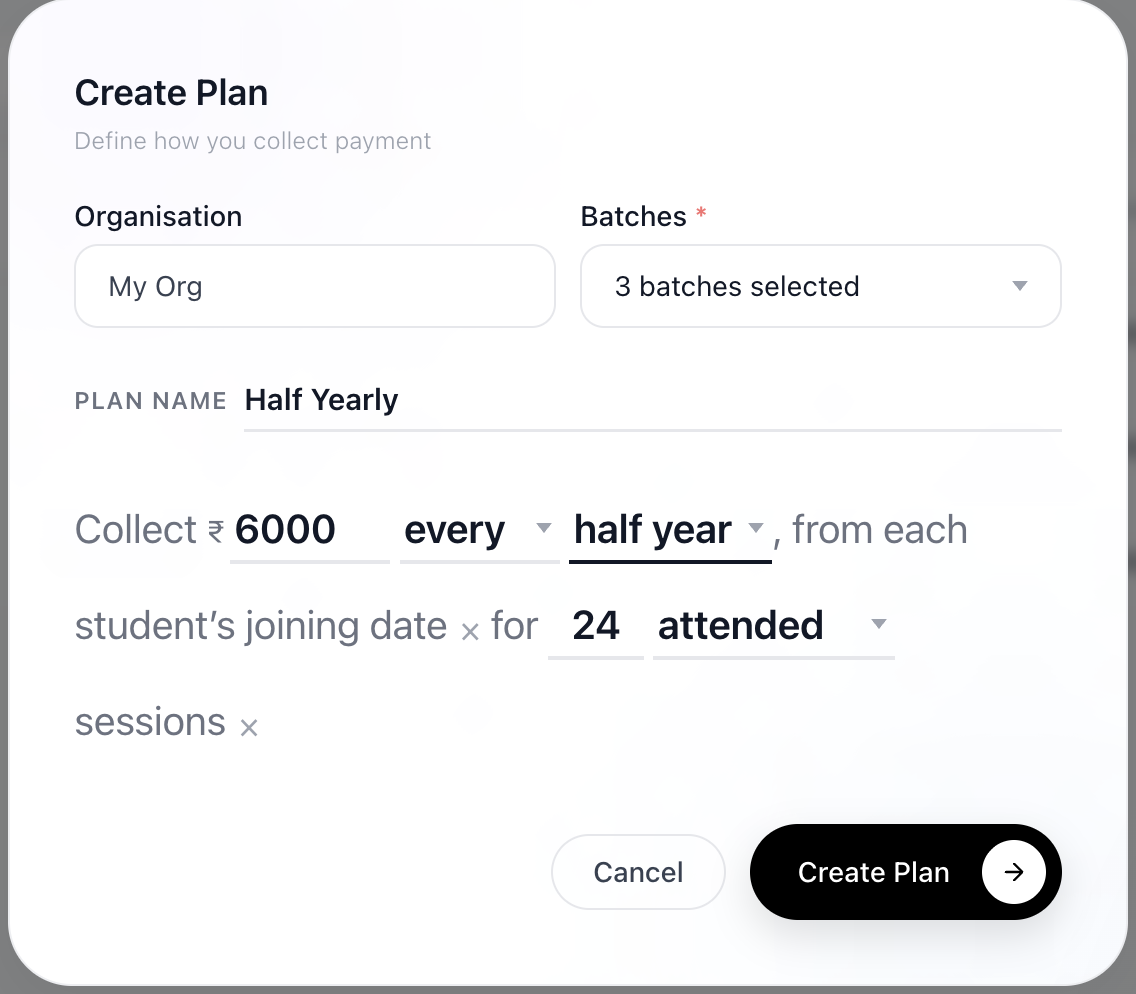
Saving the Plan
Once all details are filled:
Review the information
Click Create Plan
Once saved:
The plan becomes available for all selected batch
It can be attached to your storefront
Students can view and choose it while subscribing
Conclusion
The Plan Builder in Lynk Tower allows you to create structured pricing plans by linking them to specific batches and defining fees based on duration or sessions. By setting clear labels and pricing types, you can offer flexible and transparent pricing options to your students.