Sample Yoga Curriculum for Beginners (Editable Template)
By Swathi N ·
A 12-week beginner yoga curriculum you can actually use — covers asanas, breathwork & body awareness. Editable template, Yoga Alliance-aligned.
Picture the first day of a beginner yoga class. Half the room has never unrolled a mat before. Someone's wearing jeans. Someone else keeps glancing at the door like they might bolt. And you, the teacher, have about sixty seconds to make this feel worth their time.
That's exactly the situation this curriculum is built for.
Twelve weeks — that's the full arc here — designed to take complete beginners and give them something real: a working asana practice, a basic command of breathwork, and enough body awareness that they actually understand what they're doing and why. It doesn't matter whether you're running sessions in a Koramangala studio, a community centre in Austin, or a corporate wellness room in Mumbai. The structure holds.
The template is aligned to Yoga Alliance's 200-Hour Registered Yoga Teacher (RYT-200) foundational competencies, so if you're an RYT-200 teacher, you're already working within a framework you know. But even if you're adapting this for a different context, the sequencing logic — how skills layer onto each other week by week — is what makes it stick. A scattered class can still be a pleasant hour. It just won't build anything. This one does.
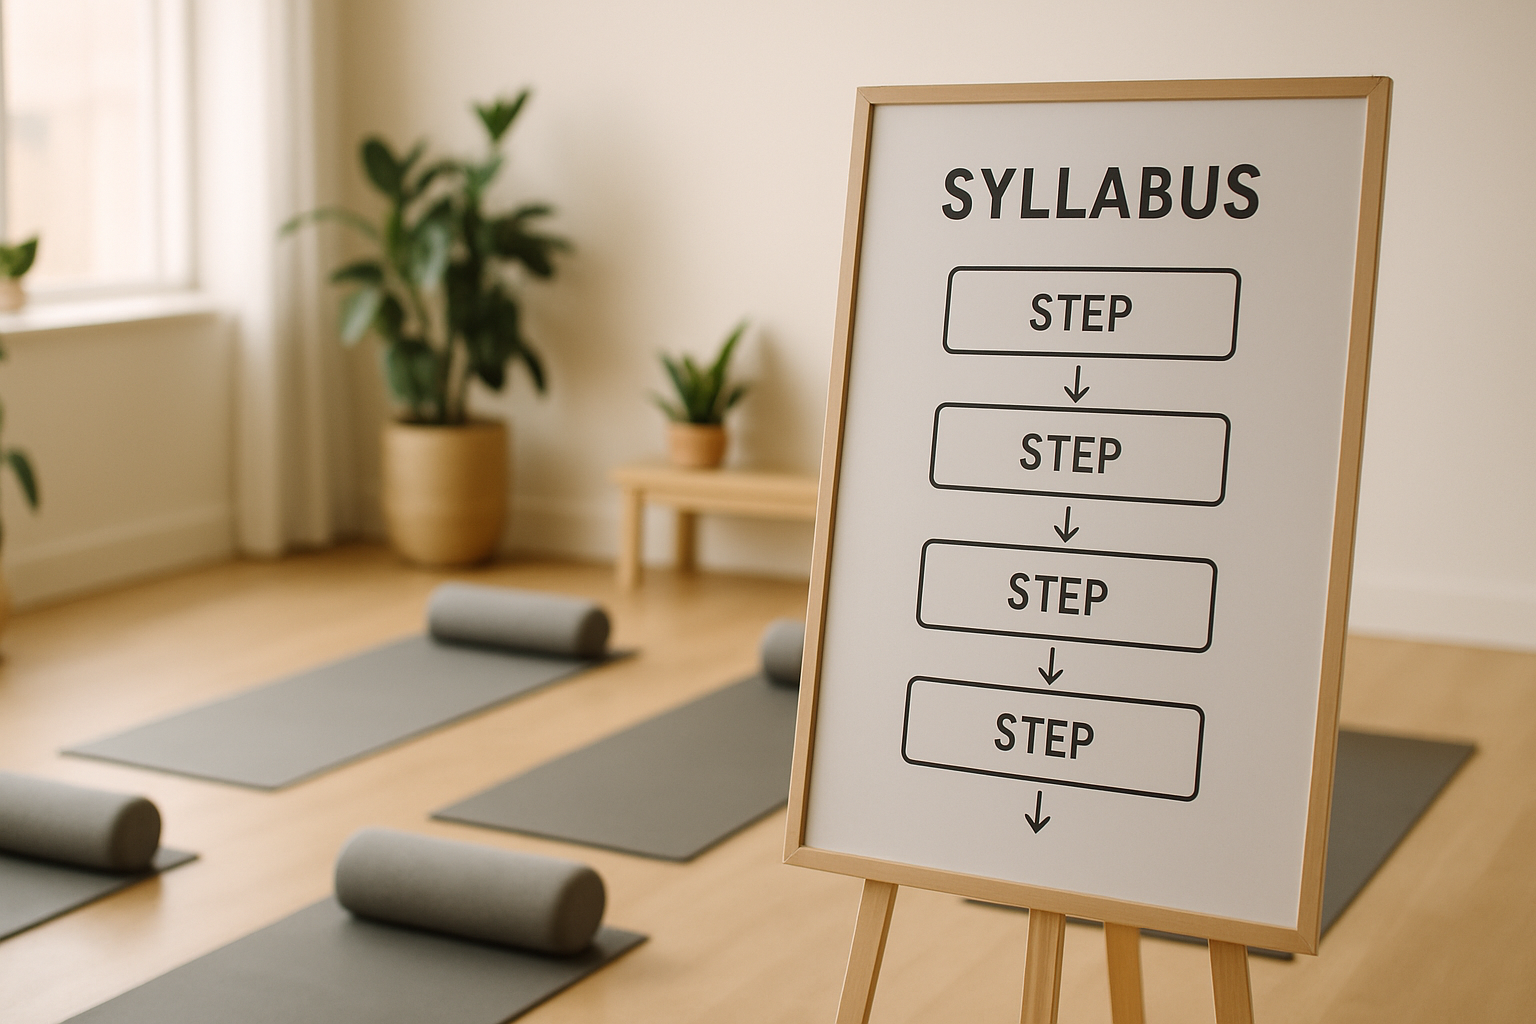
How this curriculum is built
The biggest mistake in beginner yoga programmes? Trying to teach too much, too fast. New students don't need a catalogue of thirty poses — they need five poses they can actually feel. That distinction drives everything in how this curriculum is structured.
Skill before complexity. Weeks 1–4 are deliberately narrow. The same five to seven postures repeat across multiple sessions — not because nothing else exists, but because repetition is how students stop imitating a shape and start understanding what alignment actually feels like in their own body. That's the shift worth chasing.
Breath gets its own time. Every session includes pranayama — not tucked in as a warm-up filler, but treated as a standalone skill. Diaphragmatic breathing (Dirga Pranayama) and alternate-nostril breathing (Nadi Shodhana) come in early and keep coming back. Here's the deal: a student who finishes a 12-week block with solid breath mechanics walks away with something genuinely useful. One who's collected thirty poses they can't sequence? Not so much.
Progression spirals, it doesn't just climb. Tadasana (Mountain Pose) shows up in Week 1. It also shows up in Week 10. But those aren't the same encounter — students come to it with different awareness, different questions, different bodies (in a sense). Foundational postures recur throughout this curriculum not as review, but as a deepening. There's a difference.
Assessment here isn't about flexibility benchmarks or who can touch their toes. It's observational. Two things get tracked: whether a student can demonstrate safe alignment cues on their own, and whether they can describe what they're actually feeling in a posture. That's it. Skill markers — not fitness scores.
Session structure stays fixed. Every class runs a 10% warm-up / 70% practice / 20% cool-down split. In a 60-minute session that's 6 minutes of warm-up, 42 minutes of practice, and 12 minutes of cool-down (Savasana included). Teachers who've worked through How To Write A Lesson Plan Format Tips Samples And Examples will recognise this ratio — it's a deliberate pacing choice that holds up across movement disciplines well beyond yoga.
Week 1–4: Foundation
Week 1
Here's something most beginner teachers don't expect: Week 1 isn't really about poses. It's about getting people comfortable on a rectangle of rubber.
The actual goal is simpler than it sounds — help students feel their feet, find their breath, and understand that their spine has a shape worth paying attention to. Everything else in the curriculum builds from that.
You'll cover Tadasana (Mountain Pose), Balasana (Child's Pose), Dirga Pranayama (Three-Part Breath), cat-cow (Marjaryasana-Bitilasana), and Savasana. Not a long list. That's intentional.
For timing, run roughly 6 minutes of warmup with Dirga Pranayama standing, then 40 minutes of practice, then 14 minutes winding down through Balasana into Savasana. The cool-down feels long when you first write it out — but first-session students need it.
Tadasana will cause you problems. Specifically, the pelvis-tucking problem: students who've spent years at a desk will aggressively posteriorly tilt when told to "stand up straight," collapsing the lumbar curve entirely. The cue that tends to actually work is "soften the tailbone toward the floor without dumping the lower back forward" — it gives them two reference points instead of one vague instruction.
By the end of the week, one question tells you whether the lesson landed: can they find neutral spine in Tadasana without you walking over to fix it? If yes, move on. If half the class still needs hands-on correction, slow down — Week 2 won't go anywhere useful without this foundation.
Week 2
Start week two with five rounds of Nadi Shodhana — alternate nostril breathing, three minutes tops — before anyone moves a limb. Then walk the class through Surya Namaskar A three times, slow enough that you can cue every single breath transition out loud. Knees-down Chaturanga only; nobody's earning a full push-up position yet. Close with Uttanasana and twelve minutes of floor cool-down.
The whole point of this week is breath-linked movement. Not the shapes — the linking.
Here's what you'll see in almost every beginner class the moment transitions start: held breath. Students concentrate so hard on where to put their hands and feet that breathing just... stops. It's not laziness or inattention. It's cognitive overload. Their working memory is full. So the fix isn't to correct them once and move on — it's to keep calling every inhale and exhale out loud, the entire class, for both week one and week two. Yes, it feels excessive. Do it anyway.
Poses this week: Surya Namaskar A (modified), Adho Mukha Svanasana, Uttanasana, Nadi Shodhana.
By the end of the session, each student should be able to get through one complete round of Surya Namaskar A — breath matched to movement, no prompting from you. That's the bar. One round. Unassisted. If they can do that, week two has done its job.
Week 3
By week three, the hips and hamstrings are finally getting involved — which is exactly where most beginners start to discover just how much they've been ignoring the lower half of their body.
The standing postures this week are Virabhadrasana I and II (Warrior I and Warrior II), Utthita Trikonasana (Extended Triangle), and a repeat of Uttanasana — this time with block support, because a few students will have realised by now that their hamstrings aren't quite where they thought they were.
Timing breaks down like this: 6 minutes of joint mobilisation to open the session (ankles, wrists, hips — in that order, don't skip the ankles), 42 minutes of actual practice, then 12 minutes to close with supine hip stretches and Savasana.
Here's the mistake you'll see constantly in Warrior I: the back knee collapses inward. Every time. It's almost a rite of passage at this stage, and it's worth addressing directly rather than hoping it self-corrects. The cue that tends to land — "spin the back heel down and track the front knee over the second toe" — gives students two concrete actions instead of one vague correction. Specific always beats general when someone's trying to hold a lunge and listen at the same time.
By the end of the week, each student should be able to come into Virabhadrasana I on both sides with correct knee tracking. No prompting. That's the bar.
Week 4
By week four, you're probably wondering when you'll get students off their feet and onto the floor. Here's your answer.
This is the week floor work enters the picture — specifically, axial extension and what it actually feels like to lengthen the spine from a supine position. The poses: Setu Bandha Sarvangasana (Bridge), Supta Baddha Konasana (Reclined Bound Angle), a low Bhujangasana (Cobra), and Balasana held as a genuine rest between the harder bits, not as an afterthought.
Timing-wise, you're looking at 6 minutes of Marjaryasana-Bitilasana to warm the spine — eight rounds, slow — then 42 minutes of practice, with 12 minutes of cool-down to close.
Cobra is where most beginners unravel. The instinct is to crank the head back and look at the ceiling, which compresses the neck and defeats the whole point. Don't let it slide. The cue that tends to work: "Keep the back of the neck long — look at the floor about two feet ahead of your mat." Simple. Specific. Say it before they go up, not after.
The week's benchmark is dead simple to observe: can your student move independently from Bhujangasana into Balasana as a counter-pose? No prompting, no waiting for instruction — just a clean, self-initiated transition. If they can do that, the floor sequence is landing.
Week 5–8: Building
Week 5
Goal: Layer balance and proprioception.
Poses/skills: Vrksasana (Tree Pose), Virabhadrasana III (Warrior III — hands at hips), Utkatasana (Chair Pose), review Tadasana.
Common student error: Students fix gaze on a moving object and lose balance. Cue: "pick one spot on the wall that isn't going to move."
Assessment: Vrksasana held 5 full breaths on each side, unsupported.
Week 6
Lateral and rotational movement. That's the focus this week — and it's where a lot of beginners quietly start to struggle.
The three poses on the agenda: Parivrtta Trikonasana (Revolved Triangle, modified with a block), Utthita Parsvakonasana (Extended Side Angle), and Ardha Chandrasana (Half Moon with the wall for support). None of these are simple. They ask the body to do two things at once — extend and rotate, or balance and open sideways — which is genuinely hard when you're still figuring out where your hips are in space.
Watch for torso collapse in Parivrtta Trikonasana. It's the most common thing you'll see, and it happens because students chase the twist before they've earned the length. The cue that tends to land: "length first, then twist — don't sacrifice the spine's length for rotation depth." Say it early. Say it more than once.
For assessment, you're looking at Utthita Parsvakonasana — specifically whether the student can hold a true lateral line through ear, shoulder, and hip, all in one plane. If that line is there, they've got it. If the top shoulder is rolling forward or the ear is drifting, there's more work to do.
Week 7
Here's something that trips up almost every beginner class around this point — the moment you introduce seated forward folds, half the room immediately hunches over like they're bracing for impact. Week 7 is where that habit either gets fixed or gets cemented, so it's worth slowing down.
The focus this week is building tolerance for longer holds and getting students comfortable with seated forward work. Poses on the list: Paschimottanasana (Seated Forward Fold), Janu Sirsasana (Head-to-Knee Pose), Gomukhasana arms as a shoulder opener, and an introduction to Kapalabhati — Skull-Shining Breath, kept slow at 30 rounds to start.
Paschimottanasana is where you'll earn your teaching fee this week.
The error you'll see constantly — and I mean constantly — is students rounding aggressively from the upper back instead of hinging at the hip. They think they're folding forward. They're actually just collapsing. Get straps across the feet for everyone, no negotiation, no "I'm flexible enough" exceptions. Not in this phase. The strap forces the pelvis to tilt anteriorly, which is the whole point of the pose.
By the end of the week, ask your students to explain in their own words what the difference is between lumbar flexion and hip flexion. Not to repeat a definition you gave them — to actually describe it as they understand it. If they can do that, something real has landed.
Week 8
Hand the sequence to your students this week and step back. That's the whole point of Week 8 — they run it themselves.
The sequence they'll work with: Tadasana into Surya Namaskar A (twice through), then Virabhadrasana I and II, Trikonasana, Paschimottanasana, Bridge, and finally Savasana. Nothing new here, which is intentional. They already know every pose. What's new is that they're leading each other through it, out loud, in pairs.
Expect rushing. The moment students self-direct, transitions speed up — not because they're impatient, but because they lose the external anchor of your voice and don't yet have an internal one. Fix it with a hard rule: five breaths minimum per posture, no exceptions. Make them count aloud if you have to.
By the end of the week, each student leads a 10-minute chunk of class — real cueing, real breath counts, the works. That's your assessment. You're not looking for perfection; you're looking for whether they can hold the room.
Week 9–12: Integration
Week 9
Ready to introduce inversions — but not sure how far to push it this early? That's exactly the right question to be asking.
Week 9 is where you bring in shoulder girdle work and the first real inversion prep. Nothing dramatic. Viparita Karani (Legs-Up-The-Wall) to start opening that relationship with being upside-down, then Dolphin Pose (the Makarasana variation) to build the shoulder strength that Sarvangasana will eventually demand. Ujjayi Pranayama runs through all of it — your students should be comfortable enough with it by now that it's just... there, underneath everything.
Sarvangasana is the centrepiece this week, but treat it carefully. Supported Shoulderstand only — blankets under the shoulders, minimum three folded, no exceptions. The cervical spine compression issue is real, and it's the most common thing that goes wrong here. Students either skip the blankets entirely or use one sad folded blanket that does nothing. Watch for it. Keep the posture brief too: 5–8 breaths is plenty until Week 11, when they'll have the body awareness to hold it longer safely.
For assessment, you're looking at one specific thing: can each student set up their own Sarvangasana independently, with correct blanket placement, before you've said a word? That's it. That's the bar for this week.
Week 10
Picture this: it's week ten, you ask everyone to sit cross-legged and close their eyes, and half the room quietly shifts, winces, recrosses their legs, and opens one eye to check how much longer. That's the moment you're working with. And it's actually a useful one.
This week layers a seated meditation practice onto the physical work — not as an add-on, but as the point. The poses are Sukhasana with strong spinal extension cues, Ardha Matsyendrasana (Half Lord of the Fishes), a full run of Gomukhasana, and then five minutes of seated Nadi Shodhana as the anchor for meditation.
The discomfort problem is real. Students who've spent nine weeks moving through flow sequences often find stillness genuinely harder than a Warrior sequence — their bodies aren't used to holding a seated position without something to do. Don't make the prop optional here. A bolster or block under the sit bones isn't a concession; it's what makes the posture sustainable long enough for the breath work to actually land. Put it out before class starts so nobody has to decide whether to "need" it.
Nadi Shodhana — alternating nostril breathing — gives the mind something specific enough to follow without being so complicated it becomes its own distraction. That's the trick with early meditation: vague instructions produce wandering minds, but overly technical ones produce anxiety. Alternating nostril breath sits right in the useful middle.
By the end of class, students should be able to hold that five-minute sit with the breath as anchor and without significant repositioning. Not perfectly still — that's not the bar. But settled enough that the breath is actually the focus.
Week 11
The biggest mistake at this stage? Thinking "full sequencing" just means stringing everything together and hoping it flows. It doesn't. Week 11 is where you find out which students have actually internalised the practice — and which ones have been coasting on short sequences.
The goal here is a coherent 45-minute class that pulls everything together: Surya Namaskar A (three rounds), the full Warrior sequence, Trikonasana, Ardha Chandrasana, seated work, one inversion, and a closing Savasana with guided body scan. That's the whole arc, start to finish.
Here's what actually happens in most groups — effort drops off a cliff somewhere around the seated work. Students who looked strong in Warriors are suddenly going through the motions, breath shallow, alignment gone soft. It's not laziness. It's pacing. They front-load everything and have nothing left.
The fix is dead simple but you have to say it out loud, explicitly, before the cool-down begins. Something like: "The next three poses are your landing postures — keep the breath even." That verbal cue reframes the end of the sequence as intentional, not just "almost done." Most students respond immediately when they understand what's actually happening structurally.
By the end of week 11, a student who's genuinely ready should be able to move through the full 45-minute teacher-led class without a single individual alignment correction. Not because you're not watching — you are — but because they no longer need you to intervene.
Week 12
Week 12 isn't about you anymore. You're stepping back.
Each student designs their own 20-minute sequence — drawn from anything covered in Weeks 1 through 11 — and teaches it to the group. They give each other feedback too: one technical observation, one genuine positive. That's the whole format.
Watch what they choose. Almost every student will instinctively gravitate toward their comfort poses — the ones that feel good, that they've "got." That's the tell. When you see it happening, prompt them directly: "Include at least one posture that still challenges you." That one instruction changes the entire exercise.
The assessment here is a reflection — written or spoken, either works. Ask them: what actually shifted in your body awareness between Week 1 and now? Not what they learned theoretically. What they feel differently. This maps directly to Svadhyaya (self-study), which is a required practical competency under RYT-200, and honestly it's the part of week twelve that tends to surprise teachers — students often articulate things they couldn't have named two months ago.
Editable lesson plan template
Here's a thing most teachers skip: saving their old lesson plans. Don't. Fill one of these out per session, drop it in a running folder, and by week ten you'll have actual evidence of where your class lost momentum — not a vague feeling, but a pattern right there in the "notes / observations" field. That's when the real adjustments happen.
The template itself is dead simple. Copy it, fill it in, repeat.
Date: ____   Class: ____   Level: ____

Goal of session:

Warm-up (6 min):
  - Pranayama:
  - Joint mobilisation:

Skill practice (42 min):
  - Posture 1:
  - Posture 2:
  - Posture 3:
  - Sequence / linking work:

Cool-down (12 min):
  - Counter-pose:
  - Savasana / meditation:

Props needed:

Notes / observations:
Once your students finish the full 12-week block, Lynk's free certificate generator lets you issue completion certificates — handy for studio records, and genuinely motivating for students who've made it through.
How to adapt for different levels
Beginner → Intermediate
The clearest signal that a student is ready to move beyond this curriculum: they can self-correct alignment mid-posture, hold Virabhadrasana III for 8 breaths on each side without wobble, and complete a 20-minute home practice without prompting. When you see those three markers, they're not a beginner anymore.
At the intermediate level, introduce: Sirsasana (Headstand against wall), Bakasana (Crow Pose), Ustrasana (Camel), deeper pranayama (Bhramari, Kumbhaka retention), and a longer seated meditation (15–20 minutes).
Scaling to 24 weeks for advanced students
Weeks 1–12 stay as the foundation block. Weeks 13–18 add arm balances (Bakasana, Pincha Mayurasana prep), deeper hip openers (Hanumanasana prep, Eka Pada Rajakapotasana), and introduce the Yoga Sutras of Patanjali as a reading component — 1–2 sutras per week in discussion. Weeks 19–24 focus on teaching methodology: students give 5-minute mini-lessons to the group, receiving structured feedback.
Common pitfalls when teaching this curriculum
Props don't slow students down. That's the myth, and it causes real damage. Blocks, straps, blankets — these aren't beginner accessories you phase out once someone looks more confident. They're precision instruments. A student doing Trikonasana with a block under their hand and a long spine is doing better yoga than the person dramatically touching the floor with a collapsed back. Don't let pride — theirs, or honestly yours — strip the tools away before the body is ready for them.
Breathwork is non-negotiable. Full stop.
When class runs over, the instinct is to hack off Savasana or skip the pranayama opener. Don't. Cut skill practice if you have to cut something. Students who lose their breath anchor don't just lose five minutes — they lose the whole thread that holds the session together. The breathing isn't decoration. It's the system.
Here's a pacing problem that creeps up quietly: you start designing for the student who's picking things up quickly, and suddenly half the room is just surviving. Your curriculum should track the median student, not the one who came in already flexible and body-aware. The outlier will be fine. It's everyone else you need to worry about.
Tadasana. Balasana. Savasana. Every week, without exception. Beginners need something familiar to return to — not because the material should be boring, but because novelty lands better when there's a stable foundation underneath it. Don't get so excited about introducing new postures that you stop revisiting the ones that actually build the base.
And then there's the correction problem. "Push your hip back" — said to a beginner who has never consciously felt their outer hip engage — lands as pure noise. The cue only works if it's attached to a sensation. Tell them what to do and what they should feel: "push the left hip back — you're looking for that pull along the outer left hip." One without the other is just instructions floating in space.
Frequently Asked Questions
How many sessions per week does this curriculum assume?
Picture this: two sessions a week, sixty minutes each. That's what the whole thing is built around. Not three, not five — just two.
If your students can realistically only show up once a week (and plenty of beginners can't commit to more), don't try to squeeze the same 24 sessions into fewer visits. Spread it out instead — push the curriculum to 20 weeks and let the pacing breathe.
Does this curriculum align to Yoga Alliance standards?
Here's the mistake a lot of people make with this question: they assume "aligns with Yoga Alliance standards" means it is a teacher training programme. It's not. Not even close.
What it actually does is cover the competency areas — asana, pranayama, anatomy, self-study — that sit at the core of the RYT-200 foundational framework. The same building blocks a 200-hour trained teacher would be working with when they're in front of a beginner class. So yes, the alignment is real. It's just coming at it from the student-facing side, not the teacher-certification side.
Think of it this way: a 200-hour trained teacher knows this material because they had to learn it formally. This curriculum delivers those same foundational skills to the people sitting on the mat in front of them.
What if a student has a physical limitation or injury?
Know your students' bodies before they step onto the mat. That's not optional — it's the whole job. Week 1 intake forms exist precisely for this: get the information down, flag anything relevant, and keep it somewhere you'll actually look at it (not buried in a folder you open twice a year).
The template already accounts for common limitations. Knees-down Chaturanga for anyone with wrist or shoulder issues. Wall-supported Ardha Chandrasana when balance or hip mobility is the problem. These aren't workarounds you need to invent on the spot — they're already written into the posture notes, so keep them in front of you when you're planning each session.
That said, modifications in a template can only take you so far. If you're regularly teaching students with injuries or chronic conditions, get some proper training in yoga therapy awareness. Yoga Alliance's YACEP continuing education units are a reasonable place to start — accessible, structured, and they don't require you to overhaul your entire teaching practice to be useful.
How should I handle a student who progresses much faster than the group?
Here's something that trips up a lot of new teachers: when a student starts nailing poses early, the instinct is to hand them something harder. Resist that. The depth already exists inside what they're doing — you just have to point them toward it.
Take Vrksasana in Week 5. If someone's standing there looking completely solid, don't rush them into the next pose on your list. Ask them to close their eyes. Give them a breath count to hold. Cue the internal rotation of the raised-leg femur more precisely — that alone can occupy an advanced student for weeks. There's a difference between "I can do this pose" and "I actually understand this pose," and most beginners haven't hit that second stage yet, even when it looks like they have.
Complexity lives inside every posture. You don't need to keep adding new ones to keep a fast learner engaged — and honestly, rushing them forward can backfire by skipping the foundational work that'll matter later.
Can I use this template for online or hybrid classes?
Short answer: yes, use it as-is. The template doesn't care whether your students are in the same room or three time zones away — the structure holds either way.
The one thing that actually shifts for online classes is prop setup. Don't assume students have anything ready. Build a proper 2-minute "prop check" right into your warmup: before you start, ask everyone to hold up (or show on screen) two blocks, a strap, and a folded blanket. Takes two minutes. Saves you ten minutes of mid-class chaos.
Everything else — the lesson plan template, the free fee invoice generator on Lynk — works exactly the same whether you're teaching in a studio or on a laptop at your kitchen table.
> Want one place for your schedule, payments, and student records? Try Lynk free — it's built for independent teachers running exactly this kind of programme.
Related reading: Sample Dance Curriculum for Beginners (Editable Template) — the same structured approach, applied to movement and choreography.