Sample Swimming Curriculum for Beginners (Editable Template)
By Swathi N ·
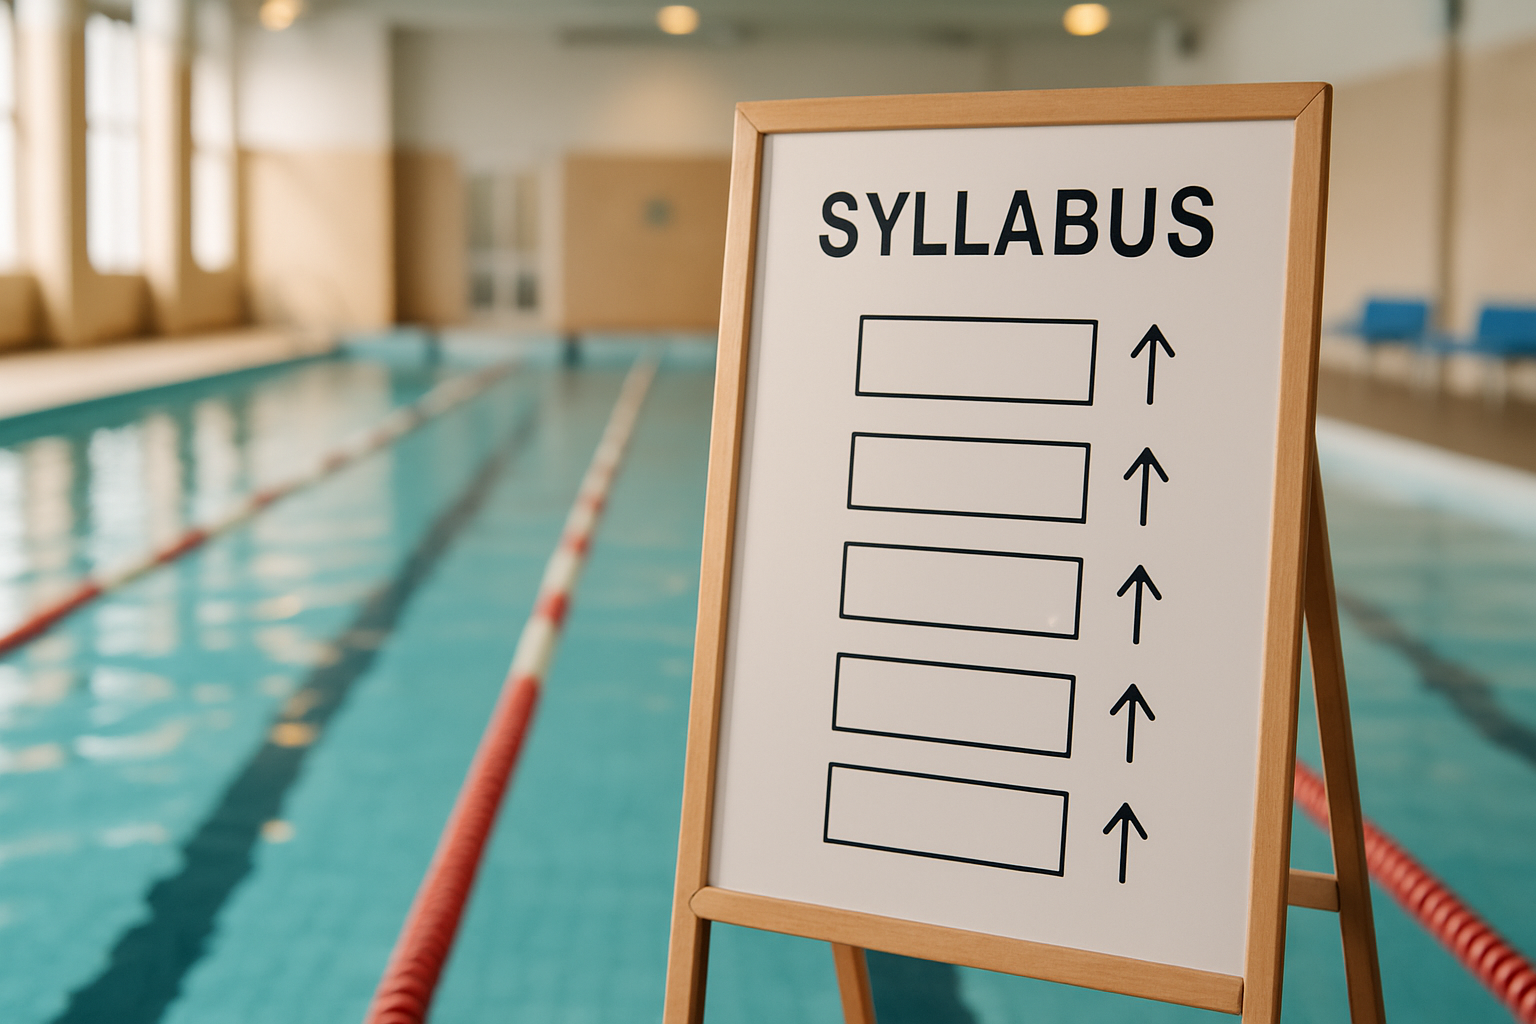
Blank 12-week calendar? This editable swim curriculum builds beginners from wall-clinging to independent swimming — using Red Cross & USA Swimming frameworks.
Picture the first day of a learn-to-swim programme: half the kids are white-knuckling the pool wall, one parent is already asking when their child will be "doing laps," and you're standing there with a whistle and a blank twelve-week calendar. That calendar doesn't have to stay blank.
This curriculum gives you a real starting point — structured, editable, and built around two frameworks that actually hold up: the American Red Cross Learn-to-Swim model and the USA Swimming progressive skill sequence. You're not piecing together a progression from guesswork or YouTube videos. The scaffolding's already there.
Twelve weeks. That's the window.
By the end of it, students should be moving independently through the water, breathing rhythmically during front crawl (not just gasping and hoping), and floating unassisted on their back. Those three outcomes aren't arbitrary — they're the benchmark that separates a child who's been introduced to water from one who's genuinely starting to swim.
How this curriculum is built
The biggest mistake in beginner swim programmes? Jumping straight to stroke mechanics before students are actually comfortable in the water. You'll see it constantly — instructors launching into freestyle arm technique while half the class is still flinching every time water hits their face. It doesn't work. And the time you lose unlearning those panic-driven compensations is brutal.
So here's what this curriculum does instead. Five principles drive every week's design, and the first one is non-negotiable: safety before technique. Breath control and basic water orientation come first — submerging, blowing bubbles, recovering from a float. A student who's quietly terrified in chest-deep water cannot learn freestyle mechanics, no matter how clearly you demonstrate them. The first two weeks exist entirely to fix that.
Drills before full strokes. Once comfort is established, strokes get broken into isolated pieces — arm pull, kick, breathing — each practised separately. The reason is pretty simple: students can only correct one variable at a time. Throw everything together too early and they start compensating (dropping the elbow to get air, scissor-kicking to stay balanced), and those habits stick hard.
Every session follows the same skeleton: 10 minutes of warm-up (water entry, bobbing, light kicking), 40 minutes of skill work, 10 minutes of cool-down (easy back float, a stretch on deck). That 10/40/10 structure isn't arbitrary — consistent session structure gives students a predictable rhythm, which actually reduces anxiety, and gives you a repeatable framework for tracking whether anyone's improving week to week.
Vague goals are useless. "Work on kicking" tells nobody anything. Instead, each week names something measurable — "kick 10 metres unassisted with a kickboard" — so there's no ambiguity about whether the week succeeded. If you want to go deeper on structuring goals like this into a full lesson plan, this guide on How To Write A Lesson Plan Format Tips Samples And Examples is genuinely useful.
And finally: progressive overload. The same skill, held to a higher standard as weeks pass. A five-second float in week two becomes a 30-second float by week five. Distance, speed, complexity — all of it increases gradually, because that's how you build capacity without overwhelming people who are still, honestly, just getting used to being in the water.
Week 1–4: Foundation
Week 1 — Getting Comfortable
Here's something most first-time swimming instructors don't expect: the hardest part of Week 1 has nothing to do with technique. It's the fear. Get that out of the way and everything else follows.
The entire week is built around one goal — make the water feel safe. That means no jumping in (step entry only), no pressure to perform, and a lot of time just getting faces wet. Skills you're working toward: face submersion with eyes open, bubble blowing through both nose and mouth, a back float with you supporting them, and basic wall hold plus push-off. Dead simple on paper. Genuinely hard for a kid who's never put their face in water before.
Structure each 60-minute session as 10 minutes of warm-up (water walking, splashing the face — nothing dramatic), 40 minutes of actual skill work, and 10 minutes of cool-down using an assisted back float. That cool-down isn't optional filler. It's when students realise the water can hold them, and that realisation matters more than anything you'll say out loud.
Watch for this: students lifting their head to breathe before they've fully exhaled. It's the most common thing you'll see, and it snowballs — they're inhaling stale air, tiring out faster than they should, and then blaming themselves for it. They're not struggling because they're bad at swimming. They're struggling because no one told them to empty the tank first. One cue fixes it almost immediately: "blow all the bubbles out first." Say it every time until it sticks.
By the end of the week, your benchmark is straightforward — each student submerges their face for a full 3 seconds and blows bubbles on their own, without you prompting them. That's it. That's the win for Week 1.
Week 2 — First Floats and Kicks
Have your students start on their backs — ears submerged, belly button pushed toward the ceiling, chin neutral. That's the whole back float in one sentence. The drill itself is dead simple: let go, count to five, done. But getting there takes a bit of work, because almost every beginner does the same thing wrong on their first attempt.
They tense up. Core tight, chin lifted, hips dropping like a stone. The moment a student feels the water shift beneath them, the instinct is to "correct" — and that correction sinks them every time. The cue that actually works: "ears in the water, belly button up." Say it, demonstrate it, repeat it until it sticks.
Alongside the back float, Week 2 introduces the front float (arms extended, face down), the jellyfish float, a wall push-off and glide, and — the one students tend to get excited about — flutter kick on a kickboard in the shallow end.
Structure your sessions at a 10/40/10 split: ten minutes of warm-up and water familiarisation, forty minutes of skill work, ten minutes to cool down and recap. The forty-minute block is where you'll cycle through all five skills, spending the most time on back float and flutter kick since those are your two assessment targets for the week.
By the end of Week 2, each student should be able to back float unassisted for 5 seconds and flutter kick their way to the lane line — roughly 5 metres. If a student is consistently sinking during the float, don't push the distance work yet. Nail the float first.
Week 3 — Arm Mechanics Introduction
By week three, most students have found their kick — now you're asking them to think about their arms at the same time. That's a bigger cognitive jump than it sounds.
The focus here is the front crawl arm pull, but you're introducing it in pieces. Not the full stroke yet. The catch-up drill is your main tool: one arm extends forward gripping the board while the other pulls through, then they swap. It forces students to feel each phase separately instead of flailing through the whole thing at once. Pair that with single-arm pull practice and some sculling work, and by the end of the session they'll have a cleaner sense of what their hands are actually supposed to do.
Flutter kick without the board — 10 metres — goes in here too. It's a confidence check as much as a skill drill. If they can't manage it, you'll know before you layer on anything else.
Bobbing. Ten reps in place. Don't skip it — it keeps water comfort ticking over while everything else gets more technical.
Session split is 10 minutes warm-up, 40 minutes main set, 10 minutes cool-down.
Here's the error that will show up almost every session: dropped elbows. The moment a student's elbow sinks during the pull phase, they've lost most of their propulsion — they're basically pushing water sideways. The cue that tends to stick is "reach over a barrel." High elbow, like something's in the way. Say it once, demonstrate it, then say it again when you see it happening (and you will see it happening).
Assessment: 10 metres flutter kick without a board, plus a single-arm pull across the pool with kickboard.
Week 4 — Breathing Patterns
By week four, most beginners are asking the same thing: when do I actually breathe? It sounds like a joke, but it's the real sticking point — and getting this right is what separates swimmers from people who just thrash to the other end.
The focus this week is bilateral breathing: introducing the concept, and then getting kick and arm movement to work together over 15 metres. Not easy. But absolutely doable.
You'll spend the session roughly 10 minutes warming up, 40 minutes on skill work, and 10 minutes cooling down.
Start stationary — face in the water, practising the side-turn before anything else is moving. The cue that actually works here is "one goggle in, one goggle out." Write it on the whiteboard if you have one. Say it ten times if you have to. Because the single most common mistake at this stage is students rotating their entire body to breathe instead of just their head — and once that habit sets in, it's a nightmare to unlearn. The one-goggle cue gives them a physical anchor that limits how far they're turning.
From there, build into kicking with side breathing, then introduce the 3-stroke breathing pattern. Weave in a back float (15 seconds — they should be reasonably comfortable with this by now) and a front glide combining kick with a single-arm pull.
Skills for the week:
- Side-breathing drill — stationary, face in water, turning to breathe
- Kicking with breathing to the side
- 3-stroke breathing pattern (introduction only)
- Back float, 15 seconds
- Front glide with kick and one arm pull
End-of-week check: can they swim 15 metres combining kick and a single-arm pull, taking at least one breath to the side? That's the bar. It doesn't need to look pretty — it just needs to happen.
Week 5–8: Building
Week 5 — Full Front Crawl Assembly
The biggest mistake week-five swimmers make? They breathe every single stroke. Every one. It feels safer, sure, but what it actually does is create a lateral head-tilt that snaps the body line sideways — and suddenly the kick, the pull, everything unravels. Before you even put them in the water for full crawl, have them practise the 3-stroke breathing count standing at the wall. Dead simple drill, makes a huge difference.
Once that rhythm clicks, the full assembly comes together faster than you'd expect: arms, kick, and breathing working as one unit rather than three separate things happening simultaneously and badly. The finger drag drill helps here — dragging the fingertips along the water's surface on recovery forces a high elbow and slows the arm down just enough that students can feel the timing. Follow that with fist drill, where they close their fists completely and swim using forearm pressure instead of the palm. Uncomfortable at first (they'll look confused), but it teaches them to feel the water in a way no amount of explaining actually can.
Rounding out the session: push-off and streamline work (because a sloppy push-off wastes the only free speed in the pool), plus kicking sets — 4 × 10 metres with a board.
Assessment is dead straightforward: front crawl for 15 metres, breathing on every third stroke. If the head's staying neutral and the body line holds, they're through.
Week 6 — Backstroke Introduction
Backstroke separates the confident swimmers from the ones who are still white-knuckling their way through every session. By the end of week 6, each student should be able to swim elementary backstroke for 15 metres and hold a back float unassisted for 30 seconds. Those are the only two targets that matter this week.
The sequence to drill is glide, pull, kick — in that order, every time. Don't let students rush the glide phase; that's where half the momentum lives. Alongside the full stroke, you'll want to run back flutter kick without a board (15 metres), one-arm backstroke circles so each side gets isolated attention, and the log roll from front to back. The log roll looks simple. It isn't, for a lot of beginners — flipping onto their back without panicking takes more trust than it looks.
The single most common breakdown you'll see: knees bending too deep on the kick. Students dig down hard, lose all their forward momentum, and then wonder why they're barely moving. The fix is dead simple — cue them to kick small, just enough that their toes break the surface. Say it exactly like that: "Small kicks, toes just break the surface." Most of them will correct almost immediately once they feel the difference.
For assessment, it's straightforward: elementary backstroke over 15 metres, then a 30-second back float with no support. Both unassisted. If a student can't hold the float, they're not ready to move on — and that's fine. The float is the foundation everything else sits on.
Week 7 — Treading Water and Deep-Water Entry
Here's something that surprises a lot of first-time instructors: deep-water entry terrifies students far more than the actual treading does. Week 7 is where that fear becomes the lesson.
The targets are simple enough — tread water for 30 seconds, enter the pool from the side without chaos. But getting there involves a few moving parts. You're introducing the eggbeater kick (just the basics, don't overthink it), arm sculling close to the surface, and a controlled jump from the pool edge. Alongside those, students should also be consolidating their front crawl to 20 metres continuous — so it's a full week, not a light one.
The most common thing you'll see: students go wide and stiff the moment they're in deep water. Arms thrashing, legs rigid, body nearly vertical — it looks exhausting because it is. The fix isn't complicated. Knees need to stay loose and relaxed for the eggbeater to actually work, and the sculling arms should stay near the surface, not chopping down into the water. Once they feel that, the whole thing clicks into something sustainable.
For the assessment, they jump from the pool edge — controlled, not a cannonball — and transition straight into treading water for 30 seconds. No pause, no grabbing the lane rope. That jump-to-tread sequence is the whole point.
Week 8 — Distance and Endurance Base
Set the target early in the session: 25 metres of front crawl, no stopping, no wall grabs. That's it. Everything else this week builds toward that one thing.
Here's what the session looks like in practice. Start with kicking sets — 4 × 15 metres with a board, steady pace, no racing. Then move into interval work: 2 × 15 metres with a 30-second rest between. That rest isn't a reward, it's structural. It teaches swimmers that pacing exists, that there's a difference between "going" and "going at a sustainable rate." Bring in elementary backstroke over 20 metres somewhere in the middle — it's a breather stroke, and letting them experience that contrast is useful. Finish with 45 seconds of timed treading water before the final attempt.
The mistake you'll see constantly? They sprint the first 10 metres and then — nothing. Arms slow down, head comes up, they're gasping at the halfway mark. It's almost universal at this stage.
The fix is counting strokes. Have them count every stroke cycle for one full lap and write it down (or just remember it). Then ask them to hit the same number next time. You're not asking them to go slower — you're giving them something concrete to regulate against, because "pace yourself" means absolutely nothing to an eight-year-old who's never swum a lap in their life.
Assessment is simple: 25 metres front crawl, unbroken. They either make it or they don't, and both outcomes tell you something useful about where week nine needs to start.
Week 9–12: Integration
Week 9 — Breaststroke Introduction
Here's a question you're probably already asking: why does breaststroke always feel like the stroke that breaks a beginner's confidence right when they're starting to find it?
Because the kick is genuinely unintuitive. Most students default to a wide frog kick with flat feet — legs splaying out like they're trying to push water sideways rather than back. It looks effortful. It goes nowhere. And the fix isn't something you can easily explain in the water, which is why dry-land practice is worth the five minutes it takes. Get them on the pool deck first, lying prone, and actually look at their ankle position before anyone gets wet.
That's the whole trick with the whip kick — flexed ankles, heels drawing up toward the glutes, then snapping outward and around. Not frog. Not wide. Whip.
For the in-water progression, start with kick on the wall (lying prone, feet flat against the wall surface to feel the push-off angle), then move to kick with a board for 10 metres, then introduce the pull-buoy arm pull in isolation so their legs aren't fighting their arms. Once both pieces feel even halfway controlled, put it together — full breaststroke, slow and deliberate, over 15 metres. Don't rush the tempo. A slow, correct stroke this week is worth far more than a fast, sloppy one. Round out the session with a 25-metre front crawl review so they're not losing ground on what they've already built.
Assessment is straightforward: 15 metres of full breaststroke, and whip kick isolated on a board for 10 metres. Watch the feet, not the arms.
Week 10 — Turns and Pool Etiquette
Watch a beginner hit the wall for the first time. Nine times out of ten, they pop straight up to the surface — no tuck, no streamline, just a flat, resistance-heavy exit that bleeds every bit of momentum they'd built. That's the turn problem in a nutshell, and it's what Week 10 is built around fixing.
The target for this week is a clean open turn — touch, tuck, push-off — followed by a proper streamline hold off the wall. Don't rush that sequence. Drill the push-off and streamline on their own first (literally just pushing off the wall and holding position), and only once that feels automatic should you attach the approach and touch. Bolt things together too early and the streamline is always the part that gets dropped.
The bigger milestone, though, is the 50-metre front crawl. Two full lengths, continuous. For a lot of students this is the moment the whole thing clicks — it stops feeling like a drill and starts feeling like actual swimming.
Lane etiquette gets introduced here too, because the moment swimmers start doing longer distances, they're sharing water with other people. Circle swimming, passing protocols, where to stop at the wall — it's not glamorous content, but skip it and you'll spend the next month managing collisions and frustration. Backstroke rounds out the week at 25 metres, and treading water for 60 seconds stays in rotation.
End-of-week assessment: 50 metres front crawl with one open turn. That's the bar.
Week 11 — Stroke Refinement
The biggest mistake coaches make in week eleven? Pushing speed on the breaststroke leg of the medley. Don't. Almost every beginner hits that third 25-metre stretch and slows right down — and that's fine. That's actually the point. Endurance and rhythm are what you're building here, not a race clock.
What this week is really about is getting all three strokes — front crawl, backstroke, breaststroke — clean enough that you can actually evaluate them. Not perfect. Evaluable.
The centrepiece is a 100-metre medley: 25 metres of front crawl, 25 backstroke, 25 breaststroke, then front crawl again to finish. Alongside that, you're revisiting the catch-up drill, introducing dolphin kick on a kickboard (board only — don't let them go free with it yet), sculling across 10 metres, and running a timed 50-metre front crawl.
That timed swim matters more than students realise. It gives them a number — something concrete to carry into week twelve. Most of them will surprise themselves.
The medley completion is your assessment marker for the week. If they get through all 100 metres, the week's done its job.
Week 12 — Final Assessment
Week 12 is a reckoning. Not a review, not a recap — an actual demonstration that your students can swim.
Five benchmarks. Every student completes all five or they don't pass. It's that clean.
- 50-metre front crawl, timed
- Treading water for 60 seconds
- Back float held for 30 seconds
- Elementary backstroke, 25 metres
- Jump entry from the pool edge
Run through your skill checklist as they go. Students who clear all five benchmarks have hit the foundational level equivalent to American Red Cross Learn-to-Swim Level 3 — and that's not nothing. That's a kid who can handle themselves in the water.
Certificates go out the same day if you want. The free certificate generator on your dashboard takes about two minutes. Worth doing — students remember it.
Editable lesson plan template
Honestly, the simplest thing you can do is keep one of these on a clipboard and fill it in before you even get on deck.
```
Date: ____ Class: ____ Level: ____
Goal of session:
Warm-up (10 min):
- Water entry method:
- Warm-up activity (bobbing, easy kick, sculling):
Skill practice (40 min):
- Drill 1 — name + reps/distance:
- Drill 2 — name + reps/distance:
- Drill 3 — name + reps/distance:
- Full stroke or combined activity:
Cool-down (10 min):
- Activity (back float, easy kick, stretch on deck):
Assessment checkpoint:
- What specific outcome tells you today worked?
Notes / observations:
- Student X:
- Student Y:
- Adjustments for next session:
```
Copy it, duplicate it for every class, and don't overthink the formatting — the point is just that you're writing things down before you forget them poolside.
How to adapt for different levels
Beginner to Intermediate (extending to 24 weeks)
Keep the 10/40/10 session structure intact — that doesn't change. What changes is what you put inside it. Weeks 1–12 cover the foundational work; here's how you build the next three months on top of that.
- Weeks 13–16: Introduce butterfly — dolphin kick first, then the over-water arm recovery once the kick has some consistency. Add flip turns on front crawl, push for 100-metre continuous front crawl, and bring in basic interval sets.
- Weeks 17–20: Individual medley, 100 metres (four strokes × 25m each). Use this phase for stroke-specific refinement, open water orientation concepts, and getting students thinking about pacing and split times.
- Weeks 21–24: 200-metre continuous swim in any stroke, competitive turn practice, personal time trials, and group relay formats to close things out.
Scaling for adults vs. children
Adults and kids need genuinely different things — not just tweaked timings, but different psychological handling.
Adult beginners carry more anxiety around submersion than most coaches expect. Don't rush past Week 1 content after a single session. Give it two sessions before moving forward, even if the group seems ready. That extra time costs you nothing and prevents the kind of freeze-up that derails progress at Week 4.
With kids aged 5–7, the 40-minute skill block is too long. Cut it to 20–25 minutes and fill the gap with games — treasure dives, noodle races, tag. It sounds less structured than it is. They're still drilling the same movements; they just don't know that's what they're doing, which means they'll happily repeat the reps instead of switching off.
Group size adjustments
The ideal ratio in the water is 1 instructor to 6 students. If you're working with 10–12, you need a workaround — and the pairing system is the most practical one. One student swims, one watches specifically for that week's cue error. It gives the observer something concrete to focus on, and it keeps the whole group engaged during what would otherwise be dead downtime.
Common pitfalls when teaching this curriculum
1. Rushing the foundation weeks. Students get excited fast — and that excitement makes it tempting to jump straight into strokes. Don't. A student who hasn't nailed floating will compensate. Every single stroke they learn after that gets built on top of those compensations, and over twelve weeks, that compounds into something genuinely hard to undo.
2. Skipping the warm-up. Those first ten minutes of bobbing and sculling aren't filler. They're doing something specific: adjusting students to water temperature, settling breathing patterns, getting the body ready for technical work. Skip them, and your first real skill block just becomes the warm-up anyway. You've lost nothing on paper and everything in practice.
3. Stacking cues. One. One technical cue, per drill, per class. That's the rule. Tell a student to fix their elbow position, breathe earlier, and kick faster in the same breath — and they'll fix exactly none of it. Pick the most important thing. Say that. Leave the rest for next week.
4. Moving the group forward when individuals aren't ready. With six to eight students, it's easy to look at the majority and call it a win. But keep a per-student checklist. One or two kids held back a week won't drag the group down — and it's the difference between a student who progresses safely and one who gets in over their head (sometimes literally). On the admin side, when you're tracking sessions and fees per student, a free fee invoice generator keeps that from becoming a mess.
5. Treating week 12 like a finish line. It isn't. Students who complete this curriculum have foundational competency — solid footing, not intermediate skill, nowhere near competitive readiness. If you don't set that expectation clearly from week one, you'll be managing disappointment at week twelve instead of celebrating real progress.
Frequently Asked Questions
What age is this curriculum designed for?
Picture a nervous seven-year-old gripping the pool ladder, and a forty-three-year-old doing exactly the same thing two lanes over. This curriculum handles both — it's built for ages 6 and up, and the progression works whether your student is in primary school or just finally decided to learn.
Under-6s need some adjustments. Cut the skill practice blocks down to 20 minutes and swap out the more structured drills for water play — but keep it purposeful. The activities should still target the same motor patterns; they just can't look like drills to a five-year-old or you'll lose them in the first ten minutes.
Adult beginners follow the same sequence, full stop. Don't reinvent the wheel for them. What changes is the pacing — they'll typically need more sessions to hit each skill milestone, partly because adult motor learning works differently, and partly because (let's be honest) they're often carrying more anxiety about water than the kids are.
How many students can one instructor manage safely?
Most instructors try to push eight, sometimes ten. It feels manageable on dry land when you're planning a session — and then you're in the water, one student is panicking at the wall, another has drifted into the wrong lane, and you've already lost track of two more. That's the reality of oversized beginner groups.
Six. That's the number most aquatics programmes land on, and it holds up for good reason. Below six, you can actually watch every student — not just scan the pool and hope. Above it, supervision gaps appear almost immediately, and individual feedback (which is basically the whole point at beginner level) becomes nearly impossible.
If your class is running larger than six, don't just soldier through. Bring in a co-instructor or a qualified assistant. It's not an admission that you can't handle the group — it's just arithmetic.
What if a student is significantly behind the group?
Week three is your deadline for flagging it. Not week five. Not week eight — by which point you've got a student who's been quietly drowning in content they weren't ready for.
If someone can't pass the week two float assessment, they don't go into kick drills. Full stop. You put them on parallel practice instead: more wall float time, hands-on instructor support, whatever it takes to actually build the foundation rather than pretend it exists.
The curriculum isn't a conveyor belt. Progression has to be earned — and when it isn't, the whole structure falls apart for that student. Catch it early, adapt fast, and don't assume forward movement just because the calendar says so.
Does this curriculum align to any recognized standard?
Short answer: yes. The skill progression here follows the same logic as the American Red Cross Learn-to-Swim framework, and it lines up with USA Swimming's foundational benchmarks well enough that instructors trained in either system will find it familiar territory.
What it isn't — and this is worth being clear about — is a replacement for formal Red Cross instructor certification. That's a separate thing entirely. But if you're already certified (or working toward it), this curriculum is built to slot in alongside that training, not fight against it.
Can this template be used for open-water or lake swimming programs?
Short answer: yes, but with one asterisk. Weeks 1–10 carry over almost untouched — the water comfort work, breathing mechanics, and stroke foundations are pool-agnostic. It's only weeks 11 and 12 where you'll need to swap things out. Ditch the open turns and pool etiquette content entirely, and replace them with what actually matters in open water: getting in and out of unstructured environments safely, sighting (that head-lift technique swimmers use to stay on course during front crawl), and basic self-rescue floating. The drill structure and session ratios? Keep those exactly as-is.
The underlying logic of the template doesn't change. You're still building skills progressively — you're just pointing those skills toward a diffe